Spring Mystic Monk Coffee® Arrived!

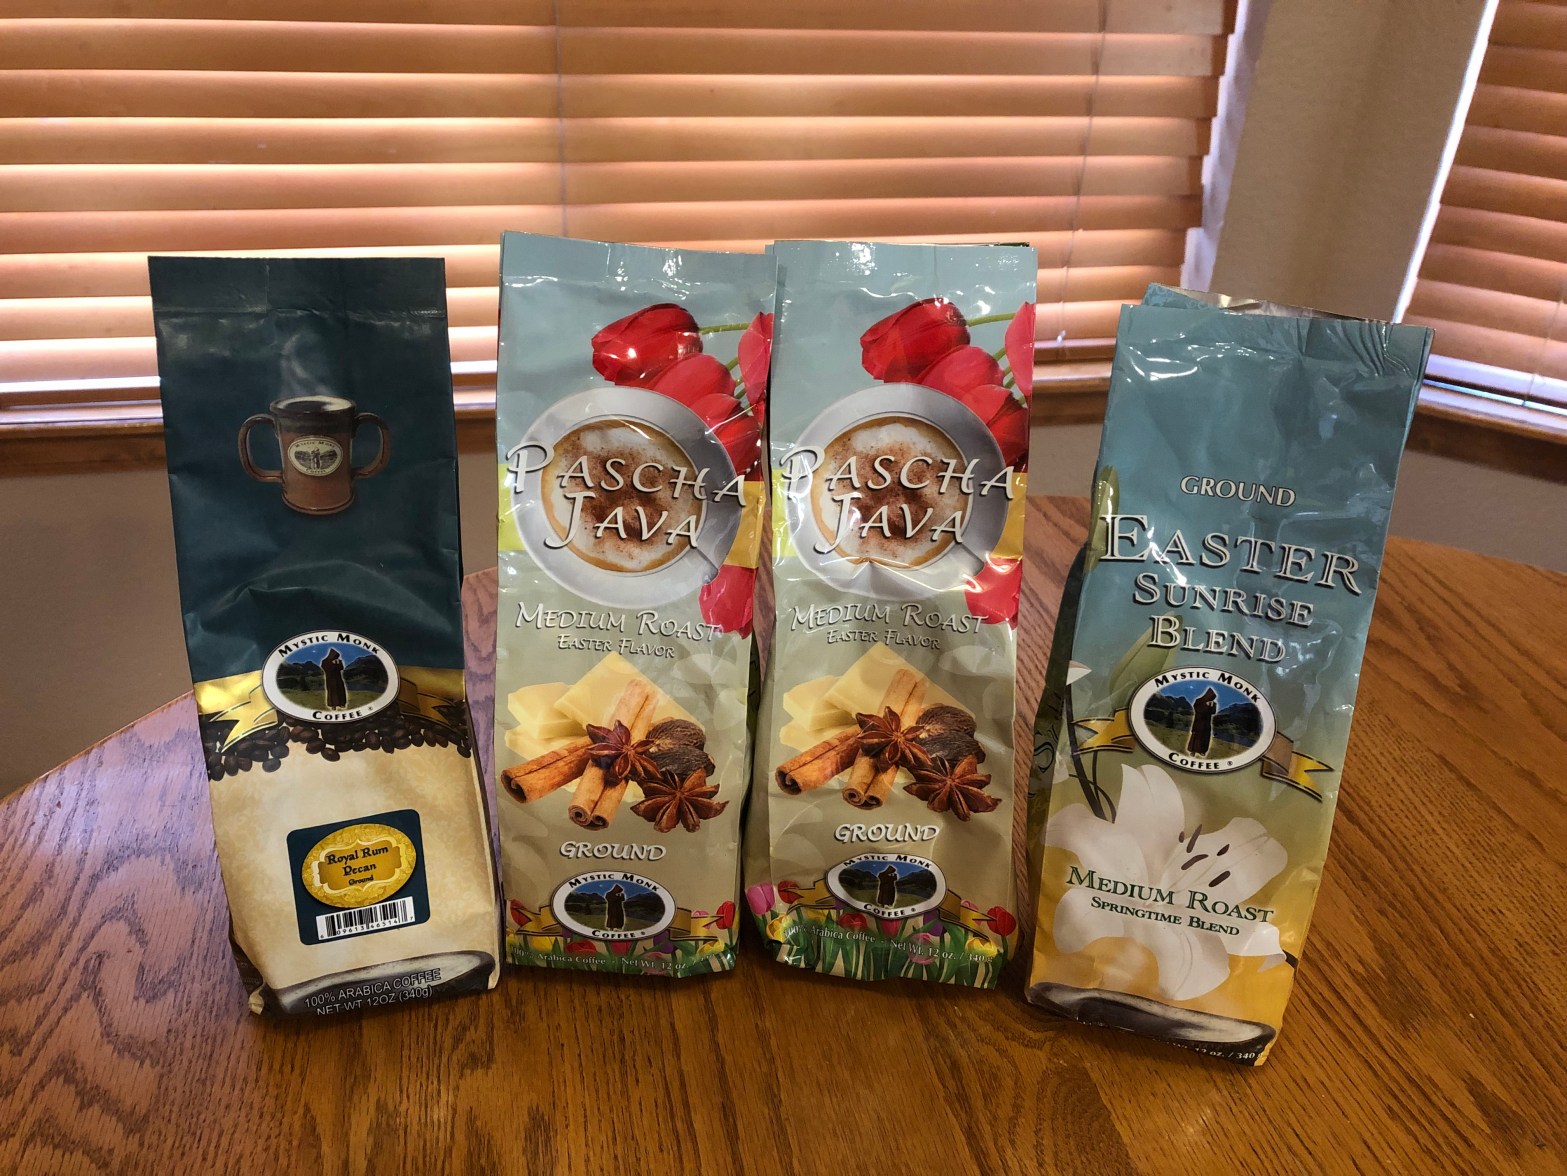
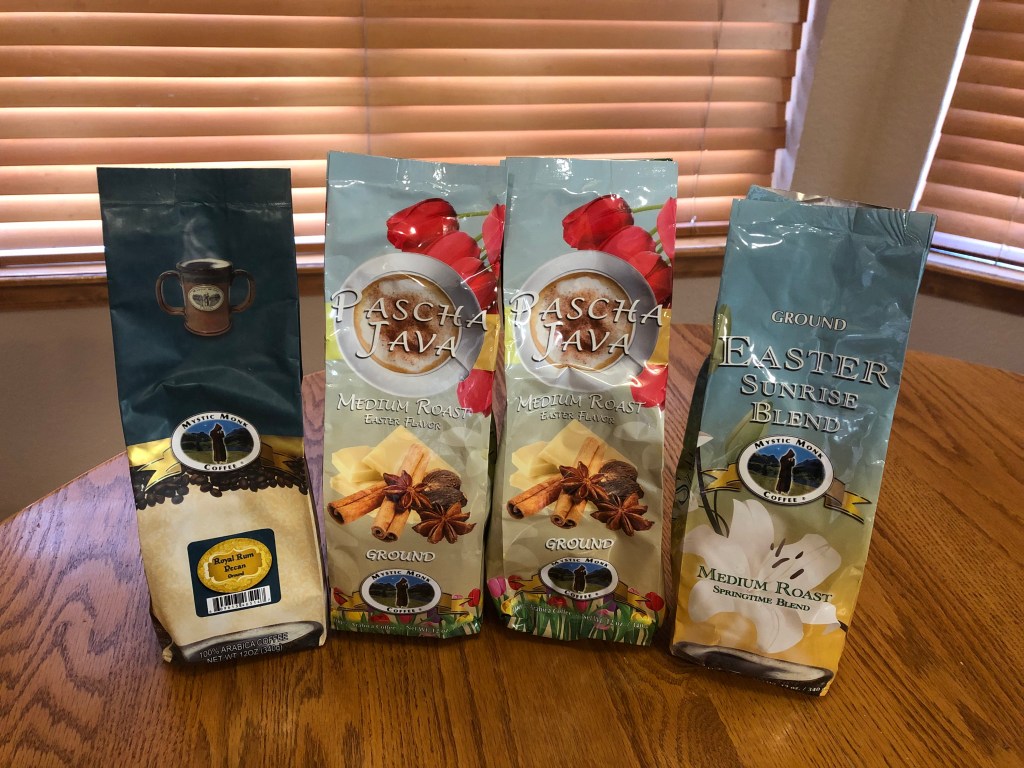
My spring order of SWW Food:Mystic Monk Coffee® has arrived! I am thankful for the Pascha Java since my Christmas Jingle Bell Java supply has run out. This is the first time I have ordered the Easter Sunrise Blend and I look forward to updating the reviews on the SWW Food:Mystic Monk Coffee® after having a cup or ten. To mix things up, I included Royal Rum Pecan since it has been a while. I haven’t decided yet which coffees are headed out camping, but I am looking forward the cool spring mornings in the camper while enjoying my fresh, hot cup of coffee.

With a new batch of coffee at the house, the article Coffee is Good for You: 8 Ways to Keep it That Way by Lynn Allison caught my eye. In this article, the benefits of coffee are extolled with riboflavin, antioxidants, calorie burning stimulation, boosting brain function, and providing protection against Alzheimer’s and Parkinson’s. While I am not sure coffee has all those benefits; it was fun to check through the 8 ways to keep coffee good for you:

  1. Avoid Buying Ground Coffee
  2. Don’t skip the filter.
  3. Skip the sugar and artificial sweeteners
  4. Cut down on coffee creamer.
  5. Don’t make coffee into a dessert.
  6. Stay clear of single-serve plastic pods.
  7. Don’t forget to clean your machine.
  8. Don’t drink coffee later in the day.

Since I drink coffee black, check for 3 through 5. However, I do enjoy an occasional Irish coffee (decaf) for dessert, especially a Nutty Irishman. An occasional indulgence can’t be all that bad, right?

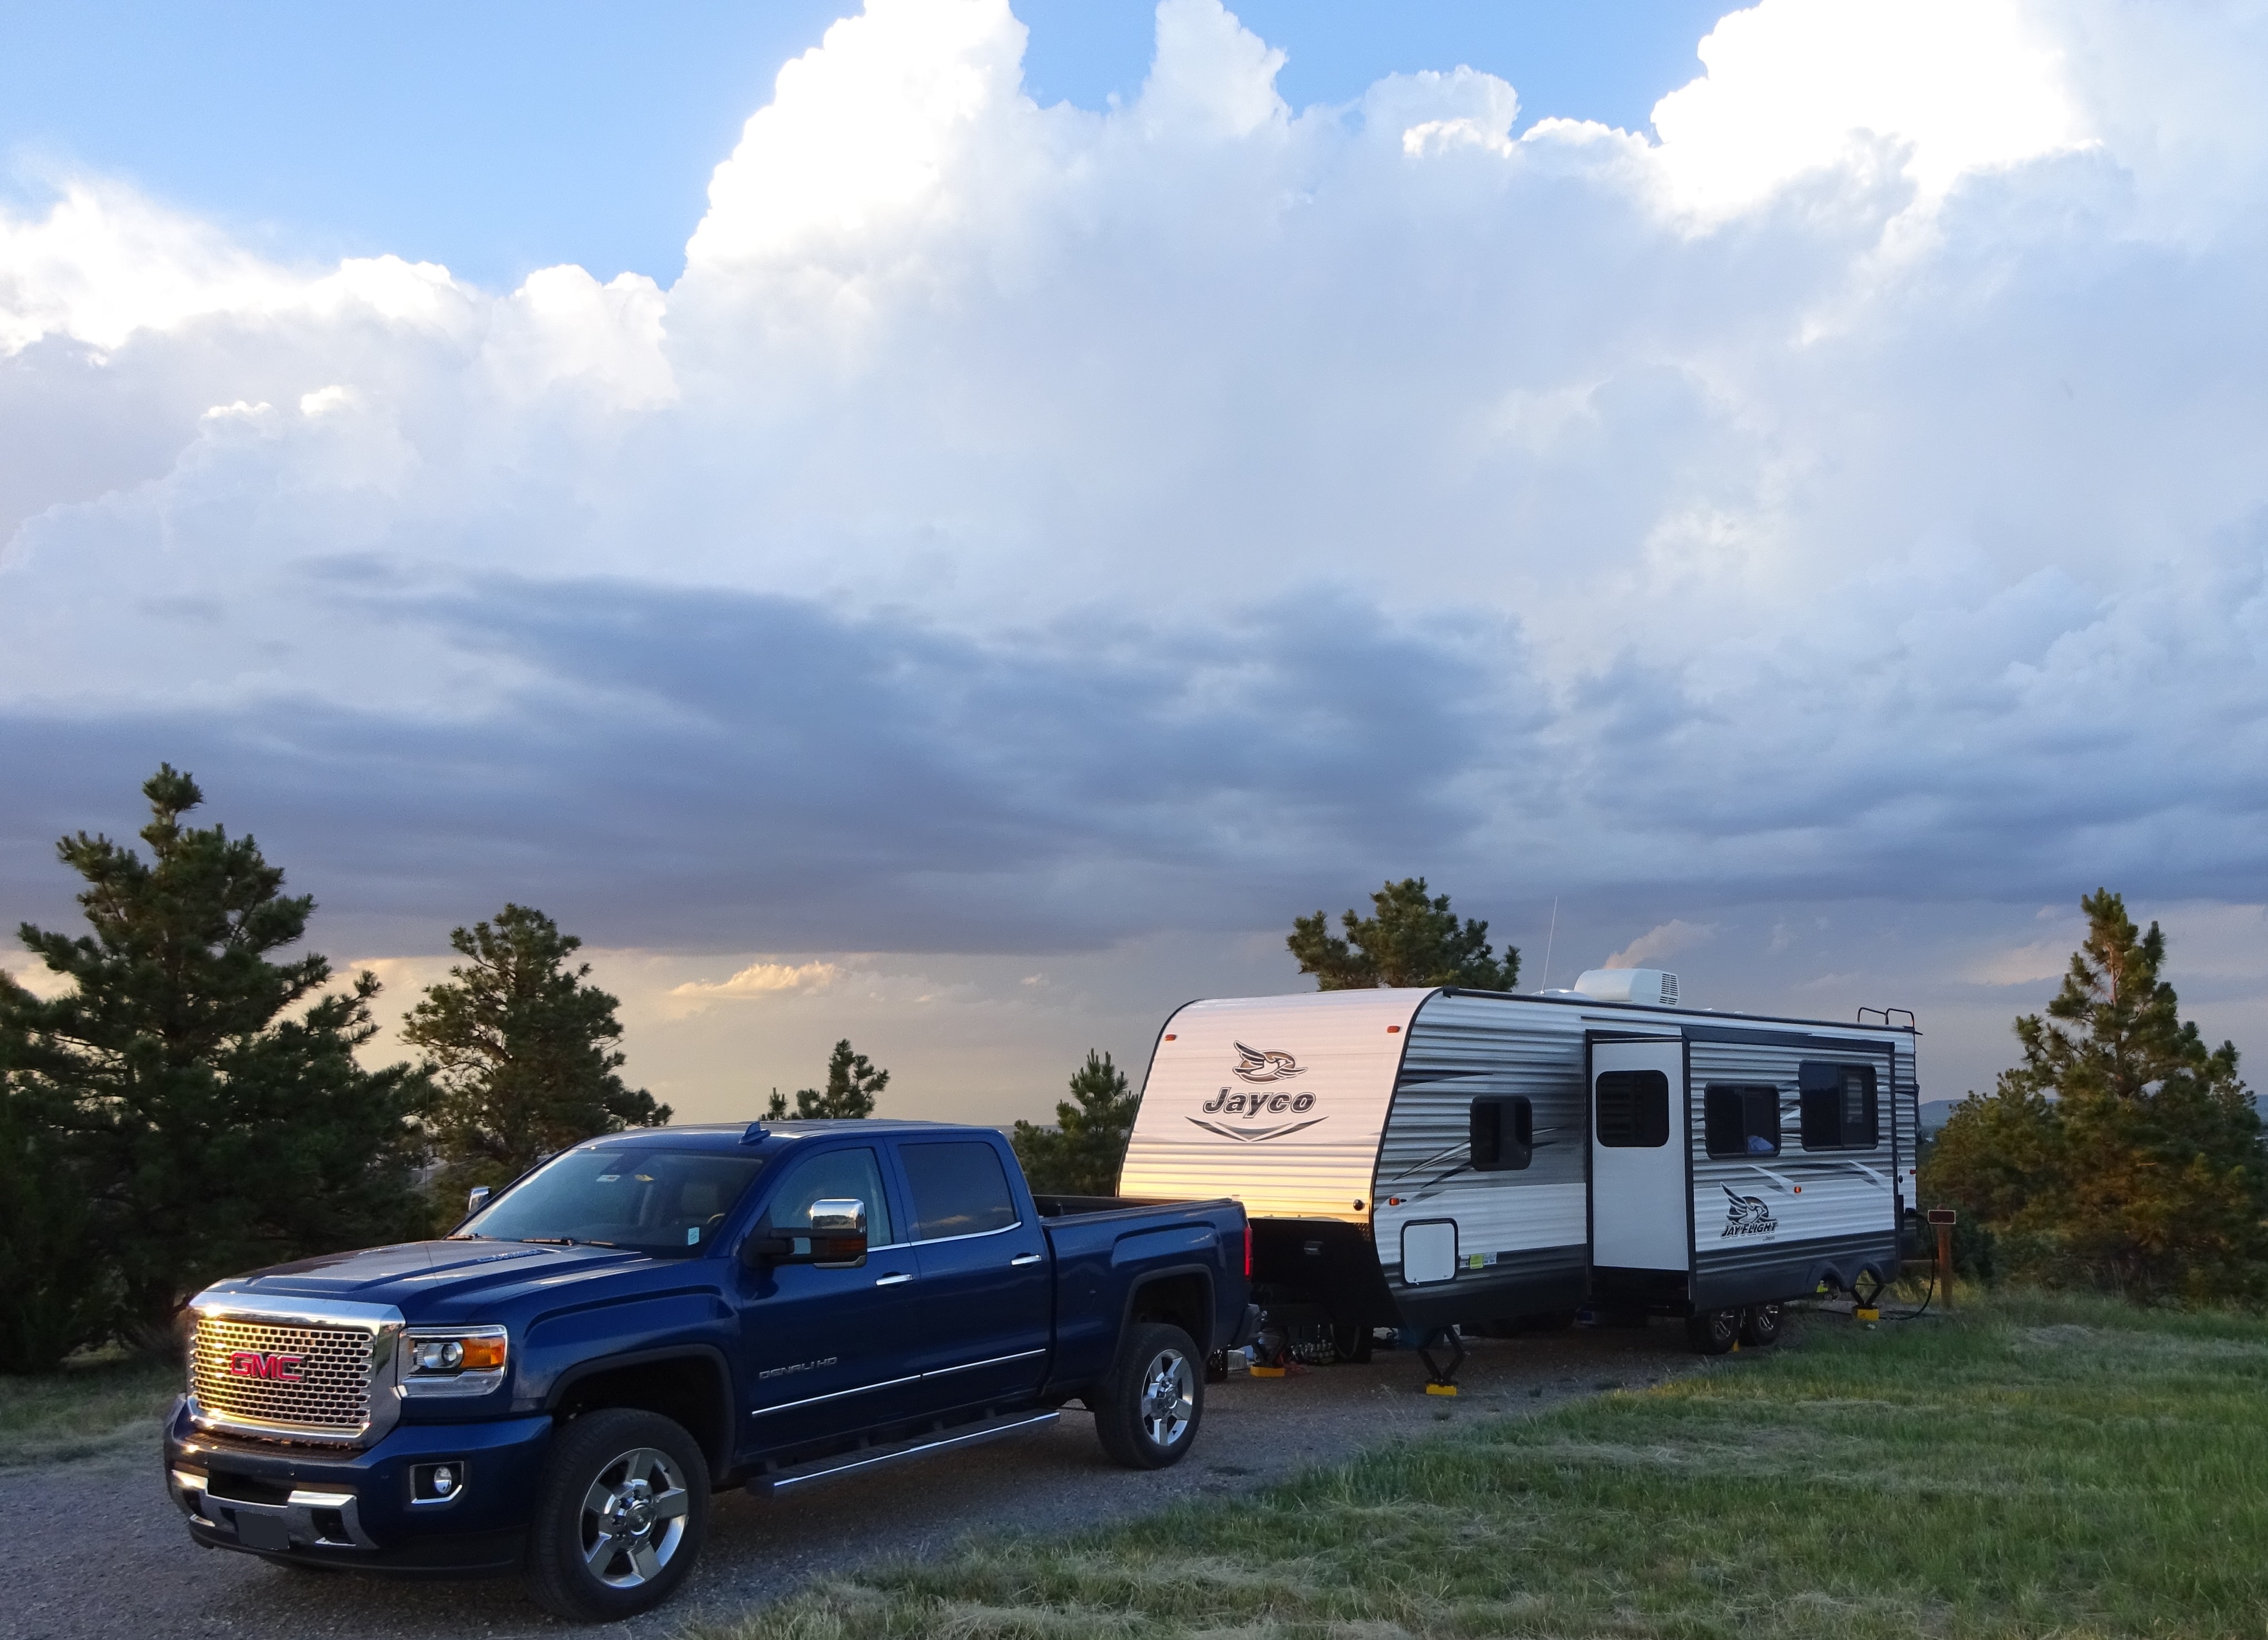
Camping has gotten me off the single-serve plastic pods, so number 6 is a check. Using the drip coffee maker in the camper revealed the richness in flavor I was missing with the single-serve system. Not to mention, I appreciate the cost savings.

Check for number 8. I have already come to the conclusion that all caffeine intake should be stopped by mid-afternoon. Caffeine consumption later in the day just causes issues going to sleep.

Number 2’s don’t skip the filter was a novel recommendation. Since I am extolling SWW Food:Mystic Monk Coffee®, I am fully expecting to be critiqued that I still use a lowly drip coffee maker. I expect commentary on different methods to get the best coffee which would include a French press or other similar filter-less method to really enhance the flavor. At least for methods not involving a filter I know to steer clear for health reasons.

Although now I have to question the use of my percolator coffee pot when boon docking and camping with the American Heritage Girls® or the Cub Scouts®. I will look into the percolator disc coffee filters or a re-usable filter for my percolator. While I don’t think my stove top coffee will cause premature death due to a heart attack; it does help justify getting the filters to keep reduce the grinds from getting into the coffee.

Umm, cleaning the coffee maker? Number 7 is a great reminder that I should do that someday; both at home and in the camper. Do you have some reliable information on how to properly clean a drip coffee maker?

Number 1 is the most intriguing. I have always bought ground coffee to avoid the extra hassle of grinding my coffee in the mornings. However, I do like gadgets, and I have been curious to know if freshly ground beans really are better than pre-ground. If you have recommendations on coffee grinders, please put them in the comments. Perhaps I will get a new gadget for the house and the camper. (Don’t tell @sowewentmom)

So We Went to the RV Show Blog contains affiliate links. By purchasing through these links, we get a small commission at no additional cost to you. As an Amazon Associate So We Went to The RV Show earns money from qualifying purchases.

So We Went to the RV Show is not affiliated with Mystic Monk Coffee®, the American Heritage Girls®, the Cub Scouts®, or Newsmax.

Bearing Repack & Oil Change

Springtime is here! It is time to start getting ready for our first camping trip of the season. The trailer cover was removed last week, trailer tires have been inflated and it is time to start towing the trailer again.

While the truck does get driven in the winter, it was notable that a tumbleweed was sitting under the truck as I head out to hitch up the trailer to get spring service.

Especially since the trailer sits for 5-6 months during the winter, I repack the bearings every spring. We travel enough during the summer months that I want to make sure there are no issues. Our friends who have spent entire trips replacing spindles and bearings because they did not keep up on this critical maintenance.

This year I decided to have the trailer tires rotated. The right rear tire has always worn faster than the other tires. After troubleshooting, watching air pressure, checking alignment, and observing wear over the season; I have come to the conclusion that the kitchen and tanks apply more pressure on this tire than the other tires. I hope that rotating the tires will get four or five seasons out of the tires rather than two.

After dropping the trailer off, it was time to turn my attention to the truck. Even though it had less than 1,600 miles over the winter, I like to change the oil and rotate the tires at the beginning of the season. This will generally cover us through the camping season.

With the repack and oil change complete, the trailer is ready for next weekend’s effort to flush the antifreeze, wipe down the interior, break out the linens, and restock the trailer for our first trip.

I am curious, the manufacturer recommends repacking the bearings every year. However, due to the inconvenience and cost, I get the impression that most people ignore this recommendation. I would like to hear what your other people really do. Please leave a comment on your thoughts about regularly repacking the bearings.

Off For The 2022 Season

With the days warming up, we are getting ready for camping. While the beginning of the week had rain; over the week the trailer cover dried out. Unfortunately, the toll of the last five winter seasons was seen during removal.

The material is turning into dust under the harsh Colorado winter sun. Where the drain spouts and edges catch the fabric, several tears have developed. Last winter’s cover installation didn’t help either when the cover tore in several places. I am glad the Chinook winds didn’t eat the cover along with the snow. While the cover survived the winter, it is time for a new one.

Now I can try the Leader Accessories Windproof Upgrade Travel Trailer RV Cover as identified in our SoWeWentStuff: Trailer Cover article. Comparing this cover to the original Elements Cover will be interesting. The Leader cover is almost half the cost; hopefully it will last as long as the Elements cover.

While I have the type of cover selected, I still have the nerve-racking decision of the choosing between the 27′ to 30′ or 30′ to 33′ cover size for our 28′ trailer. At first glance, this should be easy. My concern is due to the Elements cover size. It was 28’7″ to 31’6″ and fit our trailer like a glove and that size straddles the Leader Accessories cover sizes.

Before I can worry about a new cover and selecting the right size, I needed to get the old cover off the trailer. Even though the cover will be replaced; it needs to be folded up to get back to the house.

The wind wasn’t too bad when we started. However, once the cover was loose and needed folding the wind picked up just enough to keep pushing it around. Luckily, it didn’t get any worse and I was able hold it down long enough to fold it up.

At least the wind wasn’t as bad as putting the cover on last winter. The strong wind required @sowewentmom and sowewentkids to hold the cover sides down. This kept the cover from blowing away while I was spreading it out. I don’t want to handle the cover in that much wind again!

Teaser: You might have noticed the 10 ft ladder in this post instead of the 6 ft ladder used in the Wintering: Installing Covers post. In the future, there will be a post about replacing the ladder on the back of the trailer. However, that will have to wait until I am well along in my New Year’s resolution.

@sowewentdad

So We Went to the RV Show Blog contains affiliate links. By purchasing through these links, we get a small commission at no additional cost to you. As an Amazon Associate So We Went to The RV Show earns money from qualifying purchases.

Log Entry 20200724

After 147 entries, 18,000 miles, and 135 nights in our travel log, I ran out of the pages that I had created in the journal. I had to bring my journal into to house and create a few more pages. Hopefully now I have enough pages to last another 6 years or so.

If you are interested in what I put in my travel log, check out the project: SWW Stuff: Travel Log.

— SoWeWentDad

We Have a Screw Loose

Part of the joy of owning a travel trailer is constant repair. Today was another round of repairing loose screws in the valences and toilet paper holder.

In this case, the screws had pulled out of the thin wood paneling so a repair was required. For this repair, I use wooden toothpicks and wood glue.

With the screws removed I apply a little bit of wood glue to three toothpicks and fit them into the hole. After the glue has dried, use diagonal cutters to trim the tooth picks to the panel.

Then screw the fasteners back in. The new wood and glue gives the screws something to bit into and hold on to.

The screw driver on my pocket knife works well for getting to the screws in the valences. However, to screw into the filler wood, I used a quarter inch ratchet wrench, quarter inch socket, and a driver bit. An actual offset ratcheting screw driver would be better.

One Time Too Many

While dropping the trailer off for a bearing repack, I needed to put my chocks under the trailer. Normally, when I drop my trailer off for service I ask to use wood blocks at the service station. Due to the number of trailers they handle and that they are often moving the trailers around the chocks and block for the front tongue often get lost. This time I was running late for my diesel emissions test and didn’t have time to request wood blocks so I left my chocks under the tires.

This time the service station did a great job keeping the chocks with the trailer. However, when they were moving the trailer there was a miscommunication with the team and they accidently rolled the trailer over the chocks. This resulted in the chocks being run over one time too many.

I would like to say this was the first time the chocks have been run over, but they were already deformed from forgetting to remove the chocks a couple if times before. The service stations employee was very apologetic and wanted to get me a new set of chocks, but especially since this wasn’t the first time it was not necessary. I was just pleased that he told me about the incident.

While there are many different chocks out there, I stick with the Camco Chocks without the rope. These two chocks allow me the move the chocks into the correct position either on the same side or opposite sides of the trailer. They are lighter weight and cheaper than the heavier duty chocks. So when they get lost at service stations or possible run over again, they are easy to replace.

— SoWeWentDad

So We Went to the RV Show Blog contains affiliate links. By purchasing through these links, we get a small commission at no additional cost to you. As an Amazon Associate So We Went to The RV Show earns from qualifying purchases.

Tread Life

So after 4 years and 36 and a half thousand miles, the stock Goodyear SR-A tires needed to be replaced on the truck. A quick look at TireRack.com showed the Goodyears are not rated well; with only a 3.8 out of 10 would buy again rating. That isn’t a very strong endorsement. While the Goodyear SR-A rode well and handled OK in all seasons; the low mileage to replacement and the across the board low reviews at TireRack.com definitely made me want to look around.

Prior to towing, I used Big-0 Big Foot AT tires for a bit more aggressive tread for my 1500 truck to provide better traction in the winter months. However, with the truck’s primary purpose of towing our rig during the summer months I am more interested in a smoother ride that is still decent in winter conditions. While I still want good performance during Denver’s winter driving conditions and traveling to the mountains for skiing; the 4 wheel drive, along with sand in the bed, keeps the truck going in snowy conditions. If road conditions are more than the truck can handle with all season tires, I really don’t need or want to be on the roads.

Research on TireRack.com for 265/60 R20s brought the Michelin Defender LTX M/S to the top. Looking down the list, I compared ratings to other tires and the Michelin kept coming to the top for an all round, good all-season tire. Other comparable tires were generally more expensive. I run the Michelin Defenders on my Yukon XL and I am generally pleased with their performance. Although the tires do spin in the winter, especially with the 2 wheel drive Yukon. Because of the winter difficulties with the Yukon the new Michelin Agilis Crossclimate caught my eye.

I run the Michelin Crossclimate on SoWeWentMom’s front wheel drive Ford Fusion and have been extremely pleased with the performance. They handle rain and snowy conditions very well; especially icy or snow pack roads. These tires did reduce the fuel economy of the Fusion, but the performance is worth it. Michelin designed these specifically to make performance in dry, wet, or snowy conditions similar. This reduced the challenge adjusting stopping distances significantly in bad weather. To their credit, without telling SoWeWentMom about that feature, she came home after a snowy day dropping the kids off at school and commented how she really liked that the car stopped in the same distance on slick roads as dry. I would say Michelin hit their target. Unfortunately, in addition to the reduction in fuel economy, the Crossclimate tires are only lasting about 30 thousand miles on SoWeWentMom’s Fusion. (SoWeWentMom: I LOVE the tires on my Fusion, I cannot begin to express how well they handle in the variety of weather conditions that Colorado can throw at you year round)

I came really close to choosing the Agilis Crossclimate tires for the truck. Then Robin at Big-O tires reminded me that the Agilis Crossclimites do not have a mileage guarantee, but the Defenders have a 50,000 mile guarantee. This caused me to pause and think about what I am using the truck for.

SoWeWentMom’s Fusion is driven mostly in the winter taking the kids to and from school. The tires for the Fusion were selected to handle Colorado’s mostly dry winters while still being able to handle some snow and ice. The truck’s primary purpose is to haul the trailer during the summer months. The intent is to have smooth, quite running tires that will last a long time while handling the weight of the trailer. The tires needed to perform well on dry and wet roads. While the primary purpose is summer towing, it is still my bad weather vehicle in the winter. Therefore the tires need to provide sufficient traction in snow and ice while in 4 while drive while not forgetting that all cars are 4 wheel stop.

Since I had already chosen the Defender MS2 for the Yukon XL for many of the same purposes I wanted in my truck as a tow vehicle, I decided to go with the Michelin Defender LTX M/S. They are rated very well, at the lower end of price for the highly rated tires, have a 50,000 mile guarantee, and I am already running them on my Yukon XL. While I have had a little trouble in the winter with the tires on the Yukon, the winter driving rating a TireRack.com for the Defenders is above 8 out 10 versus the Goodyear being around 5 out of 10. Since the Truck did fine in the winter with the Goodyears, the Defenders should only improve the performance.

Lastly, now that I now the Crossclimate come in a light truck version and since SoWeWentMom is driving the Yukon XL more in the winter for carppol, my next set of tires on the Yukon will most likely be the Crossclimates.

– SoWeWentDad

So We Went to the RV Show Blog is not affiliated with Big-O Tires, Michelin, Goodyear, or TireRack.

Toilet Troubles

As we entered March it was time to start getting ready for the camping season. One of the important supplies for the season is to make sure that we have the blank tank waste digester and RV toilet paper for the season. The week we were getting ready to restock, the COVID-19 panic buying set in.

With the looming stay-at-home orders to help stop the spread of the COVID-19 virus, the paper good isles were stripped bare.

The routine restocking of our Scott Rapid-Dissolving Bath Tissue became a hunt for an elusive treasure. Luckily, we still have enough reserves in the basement to start the camping season, if the campgrounds open up.

One thing we did learn: Don’t Even Think About Charmin Ultra Soft in your RV. With our standard Kirkland Signature Bath Tissue out of stock, we picked up a package of Charmin Ultra Soft. This extremely thick toilet paper clogged up every toilet in the house; even with our powerful, no clog flush toilets. I can’t imagine what the Charmin Ultra Soft bath tissue would do to the black tank of the trailer!

We are going to keep out eyes out for our preferred bath tissue and look forward to campgrounds opening up this summer.

The RV Show

In December of 2015 after the Christmas rush, SoWeWentUncle made a passing comment that he would like to visit the RV Show in January for fun.  SoWeWentUncle’s family had been RVing for a long time, and he already had a camper, so this was something his family did on a fairly regular basis.   He had been jokingly telling us we needed to get into camping with him for a couple years now.   SoWeWentMom’s response had always been “I don’t Camp”.  We are pretty sure he thought his comment about going to the RV show had been basically ignored, so when on a whim we called him up to say lets go he was more than a little shocked.

SoWeWentUncle was already going Friday night with his younger Sister’s family, but he would be willing to go again on Saturday, the last day of the show. However, he couldn’t come until late in the afternoon.

Now SoWeWentMom wasn’t all that enthusiastic about going to the show. With two young kids, and an already busy schedule, it was just one more thing to try and cram into said schedule. Ultimately she relented, because it was getting out of the house and that was a good thing.

Prior to the RV show, we had never discussed the possibility of getting a travel trailer. In fact, other than hearing about the fun time and nostalgia of SoWeWentUncle as he talked about camping with his family; RVing had not really ever been discussed in our house.  So this excursion was intended to be nothing more than something fun to do with SoWeWentUncle.

Leading up to the RV show, SoWeWentMom and I had been looking at buying a ski condo or similar in Summit County. We had saved up a decent amount of money, but we were no where close to being able to afford anything habitable in Summit County without having to timeshare it and have a mortgage on a vacation property.  This was really discouraging for us as part time mortgaged vacation property was not something we felt was a wise choice. We were also having a lot of difficulty spending so much on a piece of property that would tie us and all of our vacations to one very specific location.

While we intended to get to the RV Show earlier on Saturday and have SoWeWentUncle meet up with us, life happens. We ended up not being able to leave for the show until after 4:00 PM, giving us only a couple of hours at the show. We hemmed and hawed, and finally decided what the heck lets go, check out the show, and grab a bite to eat.

So we went to the RV Show……….

At the show, we were able to get some dinner for the kids and then started looking at the travel trailers and fifth wheels. We couldn’t believe the number of trailers, variety of features, and crazy things we saw.     SoWeWentMom was amazed at how many trailers had more TV’s in them than we had in our home.  Many of the trailers and fifth wheels include separate entertainment rooms, fancy kids area, and wonderful finishes.  SoWeWentKids were just having a blast running from trailer to trailer and checking each one out.

Then, we started to realize that there were models that met the needs of our family at a price and weight that we could manage (or so we thought). Suddenly SoWeWentMom realized that this was not only something she could do without actually having to involve a tent, but it was something we could do AS A FAMILY.   Many of the trailers were totally in our price range without having to finance, and would accommodate travel around the country in a surprisingly more comfortable manner that previously thought.  After recovering from the shock that SoWeWentMom actually could see our family doing this and enjoying it and was seriously interested in buying a Trailer, we quickly began going through several trailers in our price range.  We started to resolve the features that we felt mattered to us and narrowed down the type of trailer we wanted.

From there we looked at the different manufacturer models that fit our criteria. Without a lot of verbal communication SoWeWentMom and I were getting on the same page of what we wanted in a trailer and that we were serious about getting one. This was additionally made a lot easier in that SoWeWentUncle has been planning and camping for a while so we weren’t as worried about whether we would use it, only about just what we were looking for, and which model fit those needs.

Finally, after looking at similar models several times and taking the time to sit in the model at the top of our list, we took the plunge.  [Side note: while in the model we finally ended up ordering, SoWeWentSon (age 4 a the time), realized we were actually buying a trailer and decided that exact model was ours. At that point he began trying to chase other buyers away, which was beyond adorable.]  As the show was closing (after it closed actually) we placed an order for our trailer.   So with he show shut down and crews hauling the trailers away, we were up in the closing room ordering our Jayco Jayflight 28BHBE travel trailer. We left around midnight (SoWeWentKids had totally passed out on the couches in the closing room at this point), but we were excited and about to embark on a growing series of amazing adventures and vacations.

So We Went to the RV Show……… and after only a couple of hours our families lives were changed forever and definitely for the better.

Winter Cover (Take Two)

Our first attempt to put the cover on for winter was interrupted for roof maintenance. (See Check Lists Save Time) The winter storm has passed and another sunny, dry weekend is available for putting the cover on the trailer. Inspection of the roof shows that all repairs are good and no other repairs are needed. The trailer is good for putting the cover on for winter.

During the first attempt we installed the tire covers to protect them from the Colorado UV light. We use double-axle tire covers that cover both tires one each side of the trailer. (See SWW Stuff: Tire Covers for more details on tire covers.) Installing the tire covers is a great job for the kids. While the installation of the cover can be done by yourself, there is an elastic strap that goes behind the tires that can be difficult to pass around. Having two people, especially two that think crawling under the trailer is really fun, makes this job much easier.

With the trailer tire covers on, we moved on to the travel trailer cover. (See Winterizing: Installing Covers for details). We put on the protective covers for the protruding parts, added padding to the ladder edges, and unrolled the cover on the roof.

Unrolling the Cover

With the cover draped over the trailer the last part is to secure the straps of the trailer. The cover came with weights to connect to the straps and throw under the trailer so you do not have to crawl under the trailer. This works OK, but having a spare kid or two hanging around works even better. the kids are usually really bored at this point, and they think crawling under the trailer with the straps is super fun, so it’s a win for everyone.

With the straps pulled tight to protect against the wind and tied up to keep dry the trailer is ready for the winter.

This will be our fourth winter for the Elements trailer cover we purchased for our first winter. The cover has weathered well over the last three winters, but each year it gets random small holes in it despite trying to cover the protruding parts of the trailer to protect the cover. The cover came with patch material which we have used sparingly for several years.

The fading of the trailer cover shows that it is protecting the trailer from UV light for those months that the trailer is not being used. However, it is getting more brittle and a larger tear occurred during installation this year. I am hoping my Gorilla Tape repair will hold through this winter.

As we were cleaning up, I noticed my lens cap was missing. Normally this is stored in my shirt pocket while using the camera, but it wasn’t there. I suspect it fell out while working on the cover at the front of the trailer. Unfortunately a walk around the trailer didn’t turn the cover up. Since I started by taking pictures inside the trailer, I needed to look in the trailer too.

Luckily, the Elements cover has a nice feature. There are zippered panels on the starboard side to allow access into the trailer when the cover is installed. SoWeWentMom used them last winter to move linens into the trailer. This year I was able to use them to look for my lost lens cap. So I was able to use the zipper access to get inside and look. Sadly, the cover was nowhere to be seen.

Looking for Lens Cap

With no luck on finding the lens cap, we decided to call it a day. The trailer is now ready for the winter until a dry day in March or April when we get ready to remove the cover for the 2020 camping season.

So We Went to the RV Show Blog contains affiliate links. By purchasing through these links, we get a small commission at no additional cost to you. As an Amazon Associate So We Went to The RV Show earns from qualifying purchases.