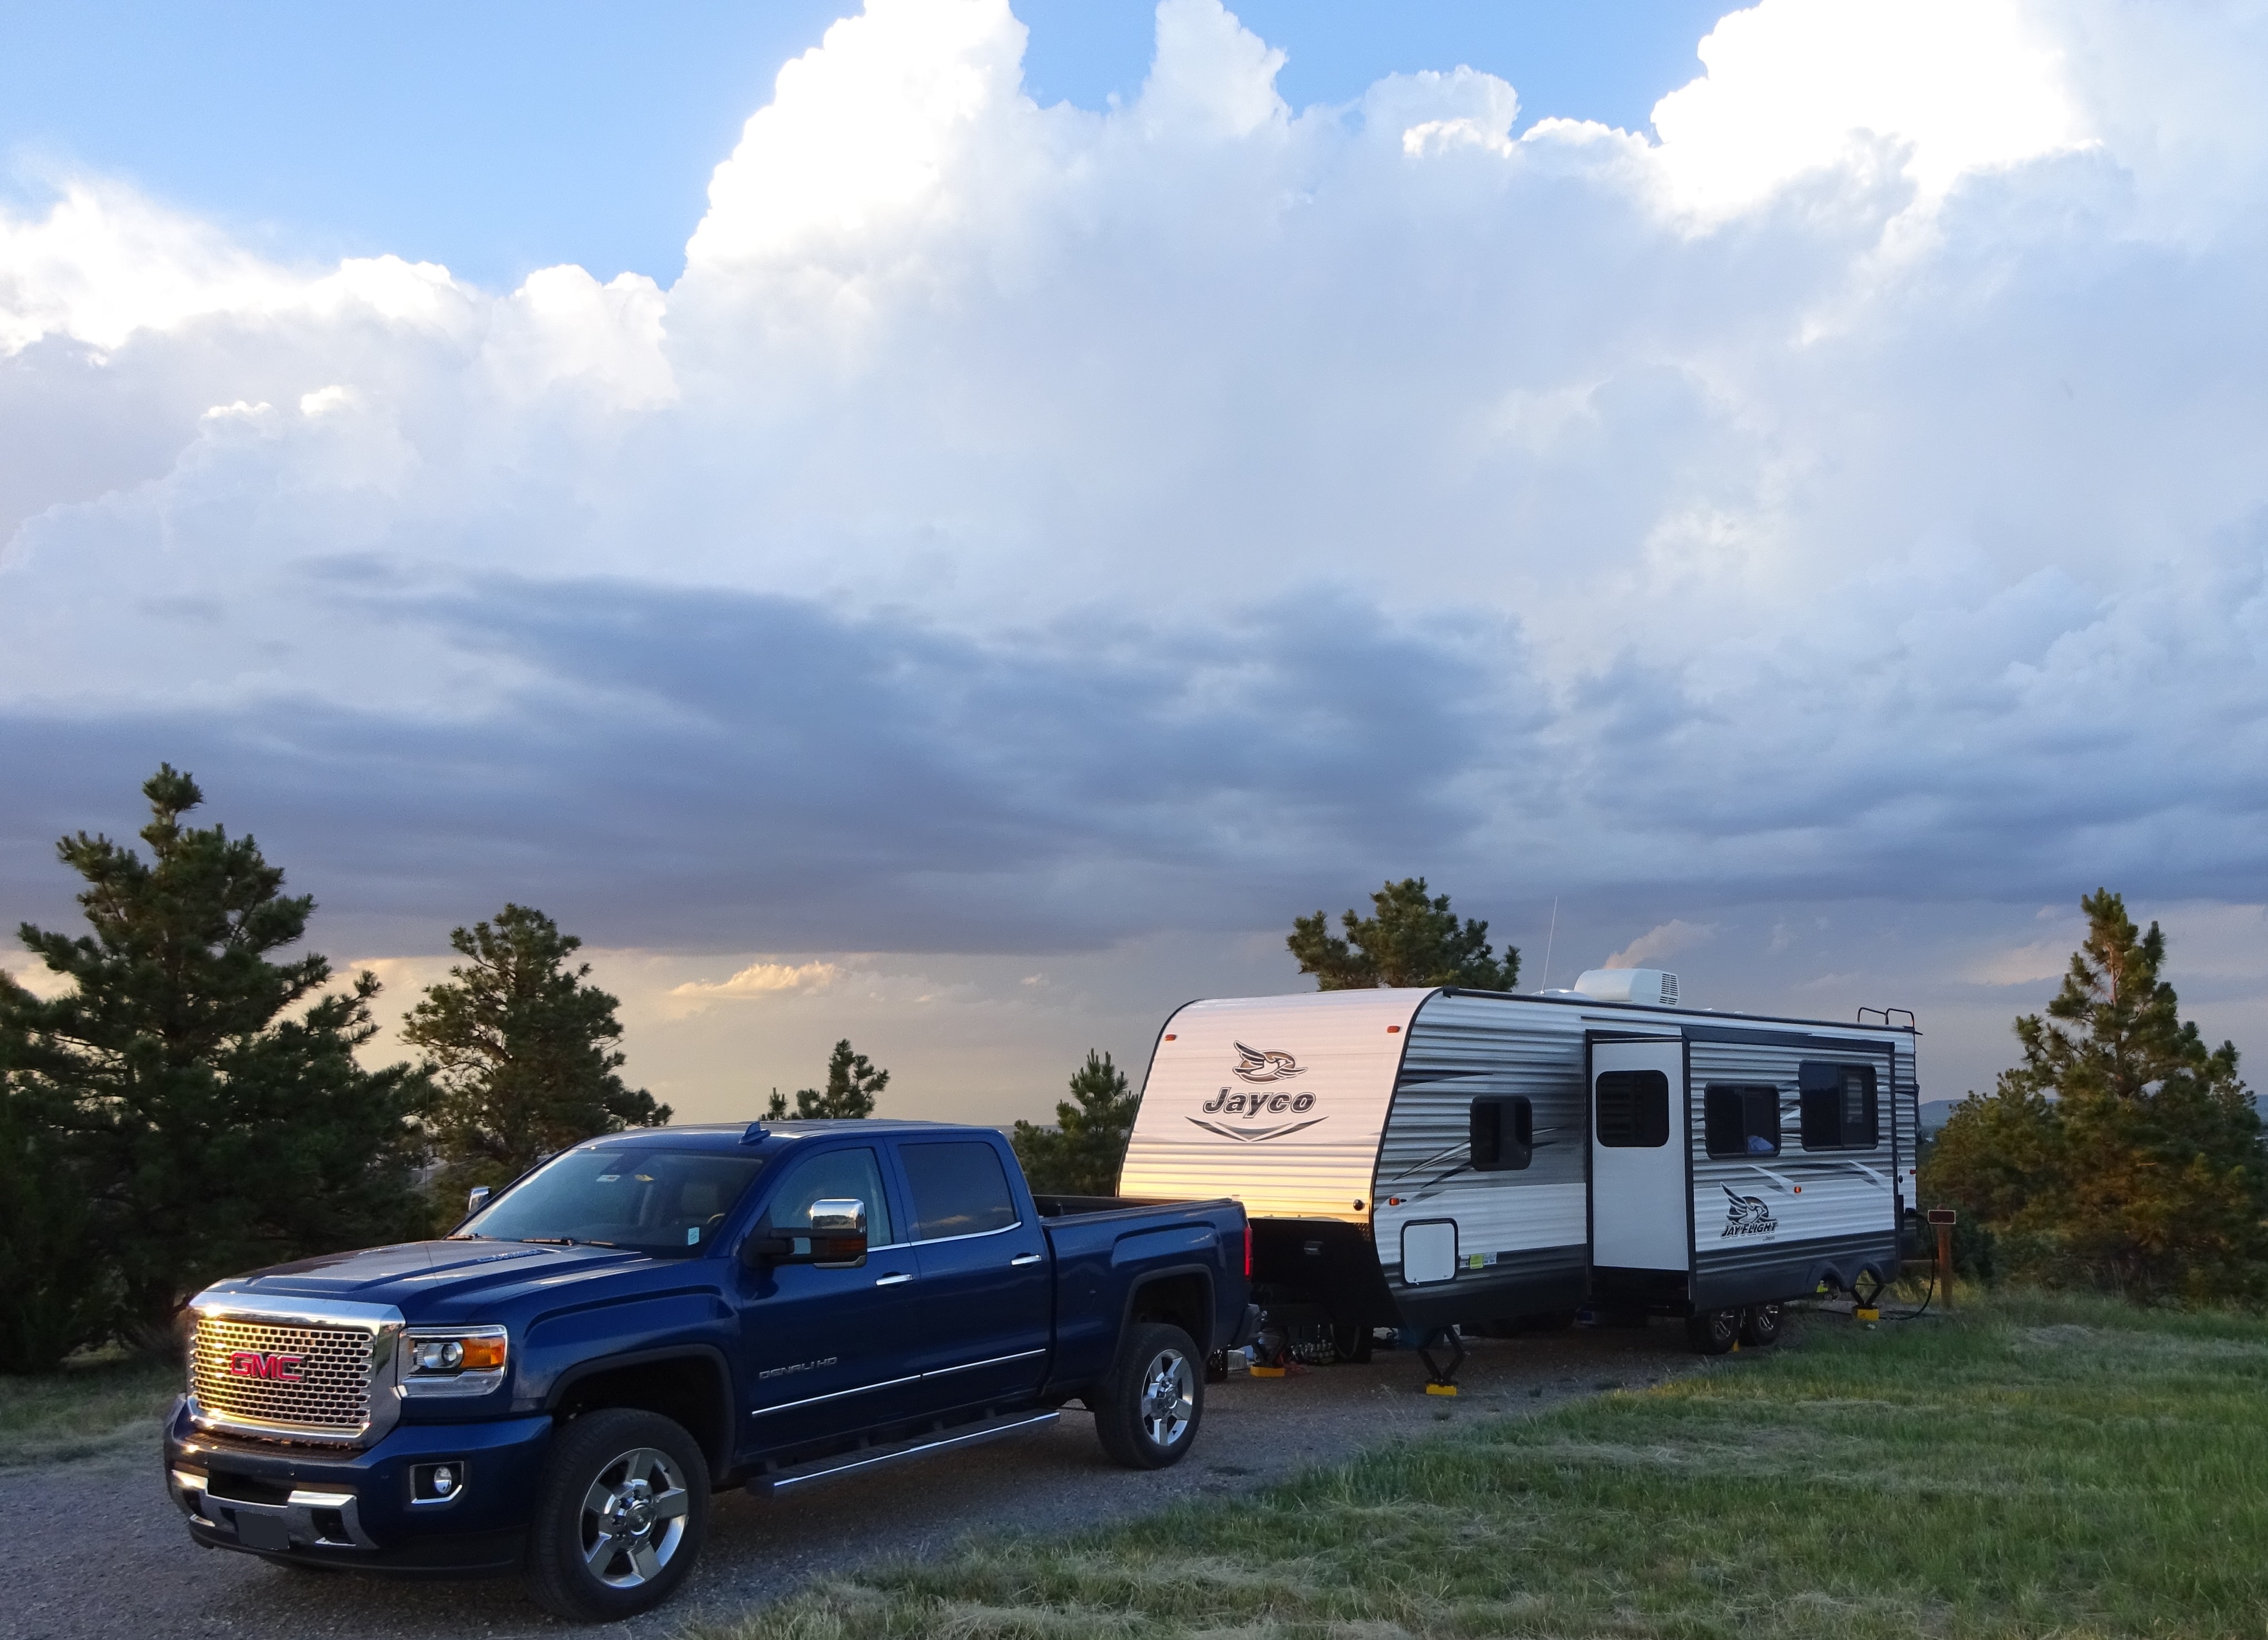

A battery disconnect switch is used to isolate the batteries from the small load of the trailers carbon monoxide detector, radio, and control boards while the trailer is in storage. This helps prolong the life of the batteries if the trailer has to stay in storage for 10 or more days between trips. The following steps are how @sowewentdad installed the Ampper battery disconnect switch on our 2016 Jayco Jayflight 28BHBE trailer.
Bill of Materials:
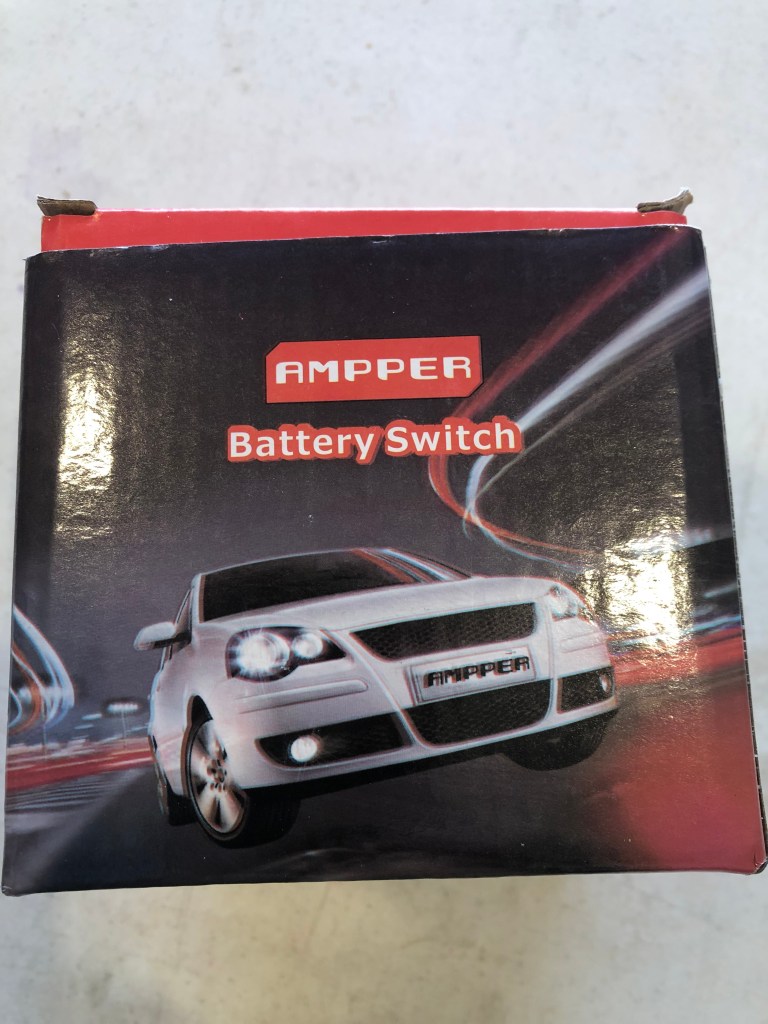
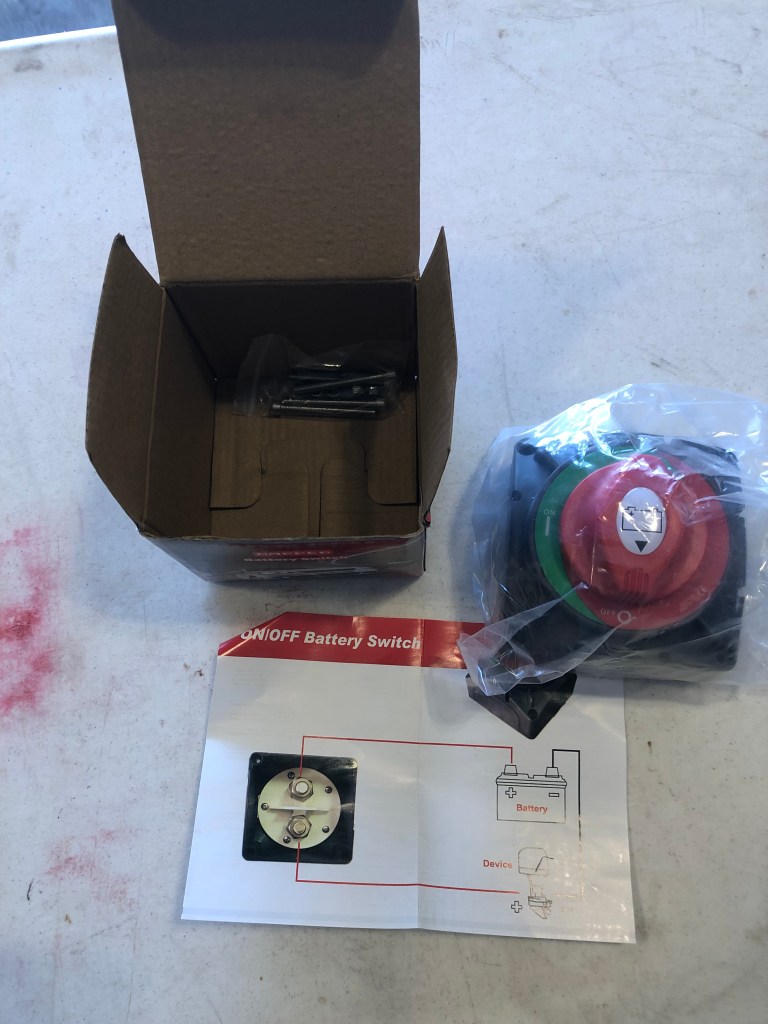
- High Current Battery Disconnect Switch (Installed)
- Battery Disconnect Switch (Recommended – High Current is not necessary of the trailer)

Consumables:
- 6 AWG-1/2″ Ring Battey Lugs with Heat Shrink Tubing
- 10 feet of 6 AWG Flexible Cable Wire – Red
- Electrical Tape
- Duct Tape (What I had, but I should have used Coax-Seal or Silicon Tape to waterproof the connections)
Equipment:
- Lug Crimper Tool
- 3 lb hammer
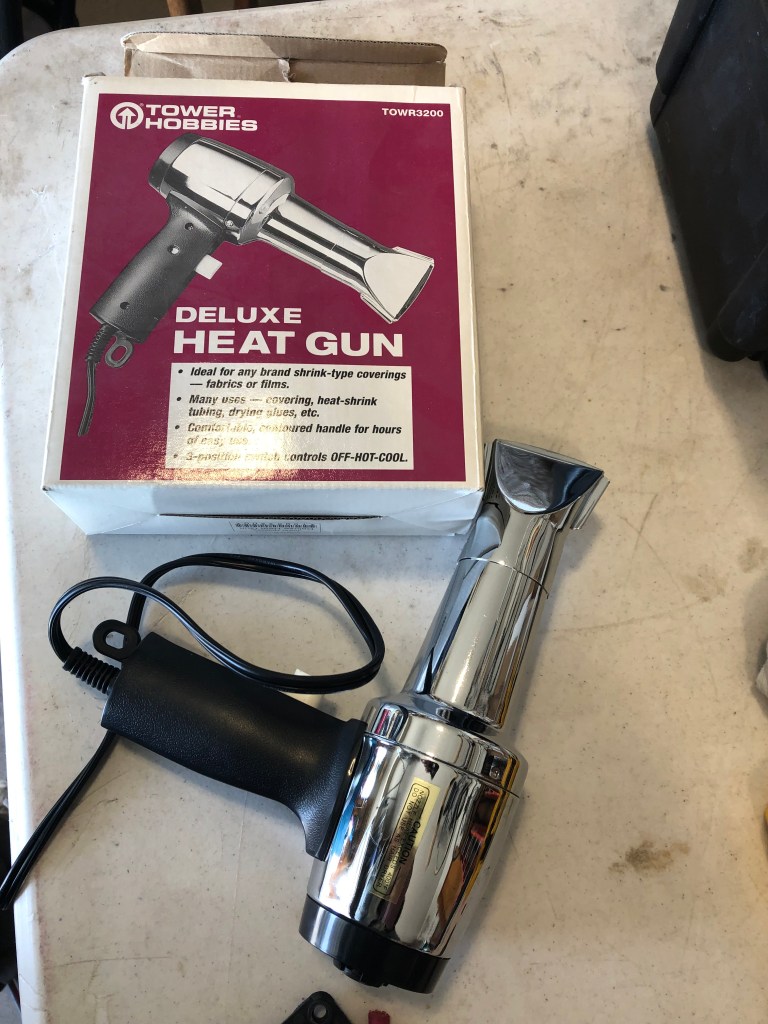
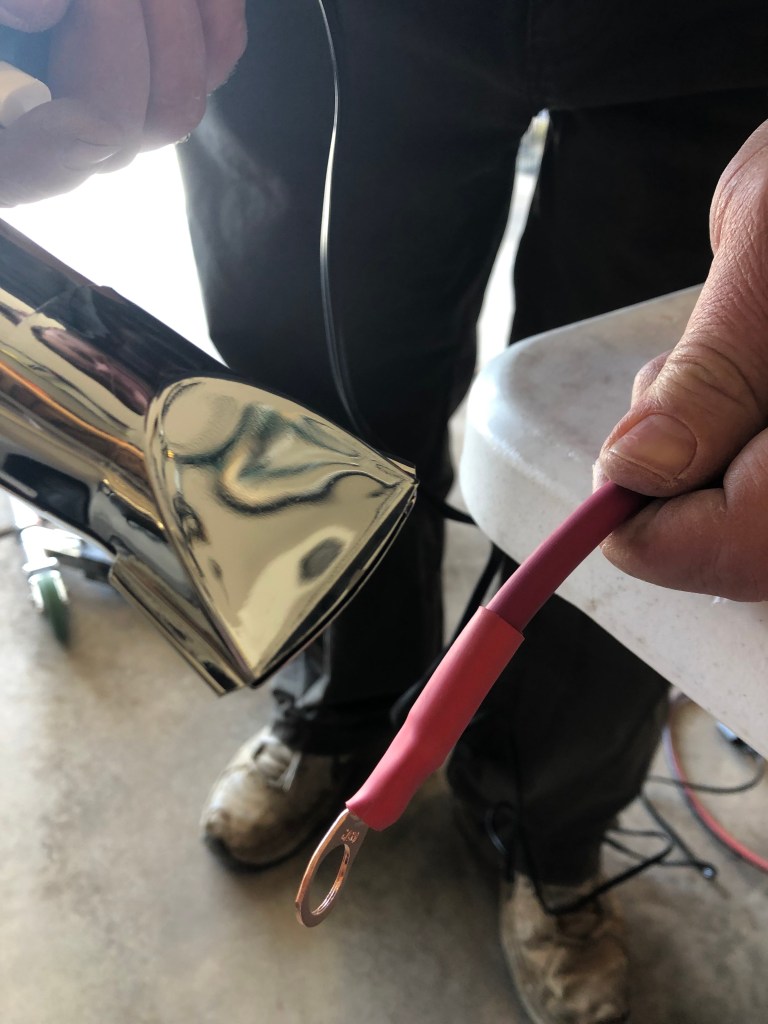
- Heat Gun
- Wire Cutter or Bolt Cutter
- Drill
- Drill Bits (1/16th in and 1/4 in)
- Adjustable Wrench
- Box Wrench (1/2 in for my batteries)
- Coping Saw
- Allen Wrenches
- Safety Glasses
Installation Steps:
Step 1: Remove Battery Covers & Disconnect the Batteries
Before working with the RV electrical system, the batteries need to be disconnected. This prevents accidental shorting of any positive connection to the chassis or negative terminals while working on the batteries. Shorting the batteries will cause damage to travel trailer, the batteries, and could seriously injure you.
Step 2: Locate Switch Location / Drill Holes
I originally planned on mounting the battery disconnect switch to the Camco Battery Box side, but the fastener heads that came with the battery disconnect switch stuck out pretty far. I was concerned these heads would gouge into the side of the batteries during travel because the batteries are not held in place in the Camco Battery Box.
I thought about installing a protective barrier between the battery and the fastener heads or going to the hardware store and finding lower profile fasteners that would work better. However, I wanted to complete this project so the trailer could be taken back to storage, and I decided to work with what I had on hand. After verifying the fastener heads would not contact the battery terminals, I decided to put the battery disconnect switch on the Camco Battery Box cover. Putting the battery disconnect switch on the cover of the Camco Battery Box mitigated the problem of the high fastener heads that came with the battery disconnect switch.
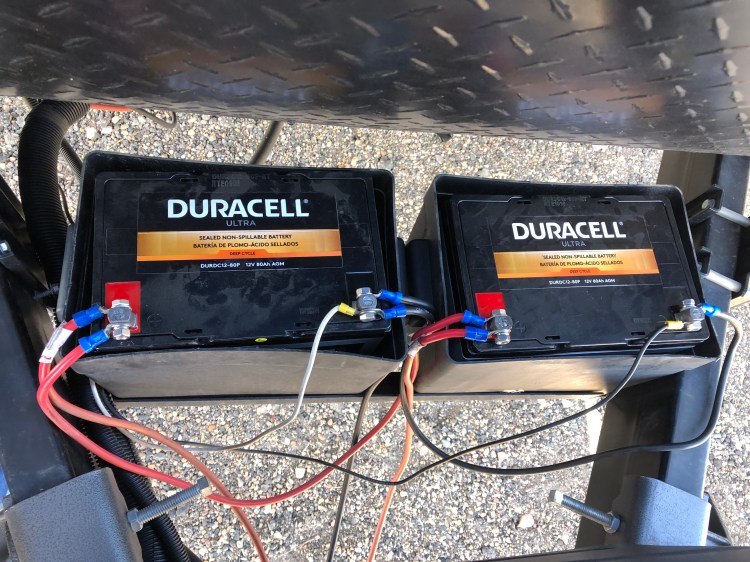
To decide which Camco Battery Box cover to install the battery disconnect switch on, I looked at how the existing battery wiring laid. Because I normally work from the driver’s side, I would have preferred the battery disconnect switch on this side. However, when I laid in the battery wiring after the battery wires shorted, I routed them from the passenger side. This limited the reach of the main battery wires from the trailer to the passenger side battery. This drove me to install the battery disconnect switch on the passenger side battery.

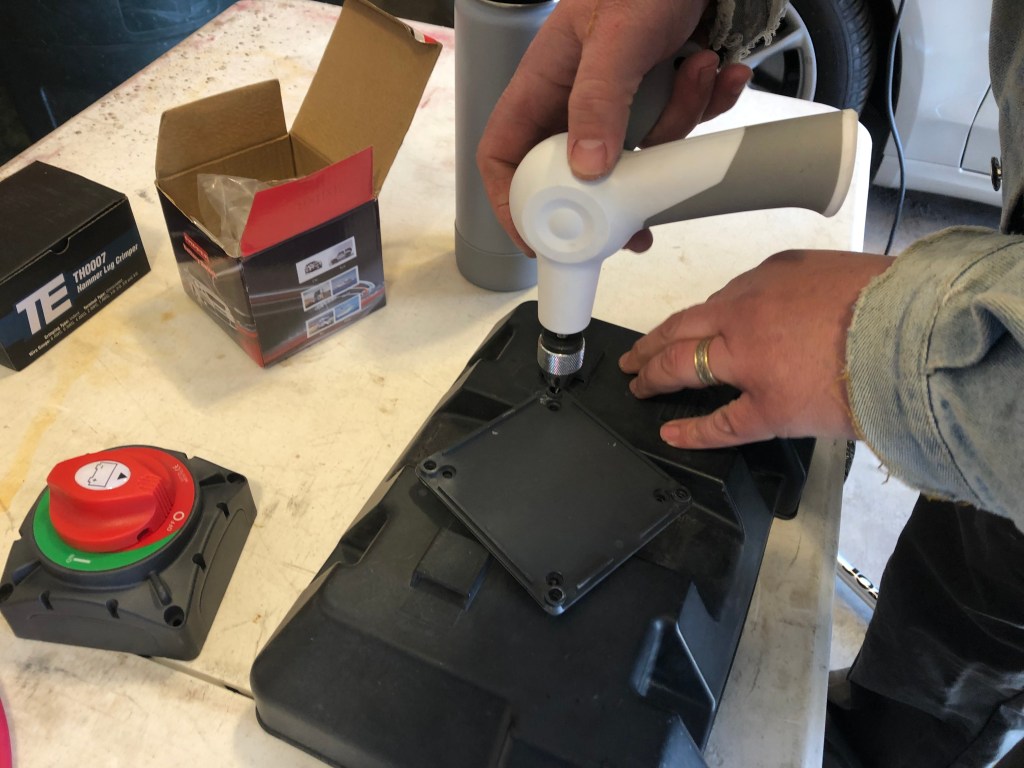
To install the battery disconnect switch, I verified the mounting holes would span the channel for the Camco Battery Box cover tie down strap and allow the strap to be installed.
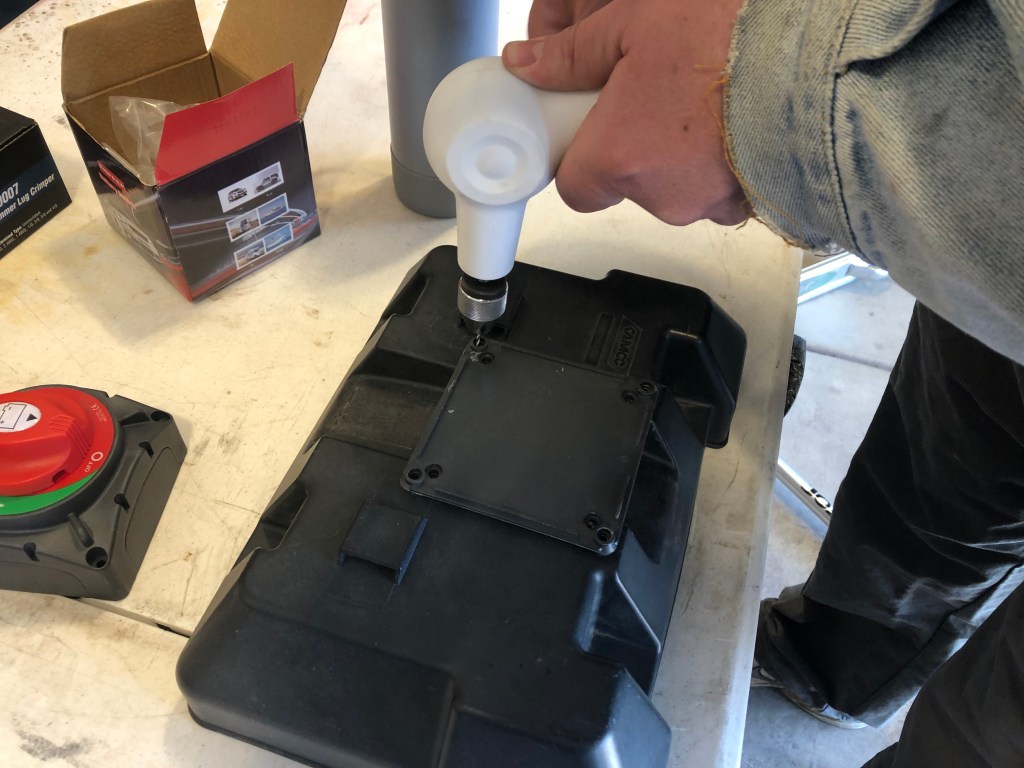
Because the cover is plastic, I used the Fiskars Hand Drill so I wouldn’t run the drill bit too fast and melt the plastic instead of drilling it. I first used a 1/16 inch bit to locate the mounting hole locations and drill pilot holes. After drilling the pilot holes, I removed the mounting plate and used a 1/4 inch bit to make the holes large enough for the mounting fasteners.
With the holes made, I verified the fit by running the fasteners through the cover and mounting plate. I also confirmed the fastener heads were tucked in the molding of the Camco Battery Box cover so they would not accidently contact the battery terminals once installed.
Step 3: Make New Battery Cable
With the location of the battery disconnect switch defined, the length of the new battery wires can be determined. I decided to run each battery positive terminal to the positive side of the battery disconnect switch rather than run one positive battery terminal wire to the battery disconnect switch and then jumper the two positive battery terminals together. I preferred handling only one wire per positive battery terminal when bolting the wires to the battery terminals and I liked not having a loose jumper wire to deal with in the winter when I remove the batteries.
When routing and selected the length of the new wires, I paid extra attention that they were long enough to work with, but short enough they didn’t contact any metal frame parts during transport. I learned the hard way, that if a battery wire is in contact with the metal trailer frame, especially an edge, the motion during transport will eventually wear through the insulation and short the batteries. It was exciting enough the first time and I don’t want to repeat that again!
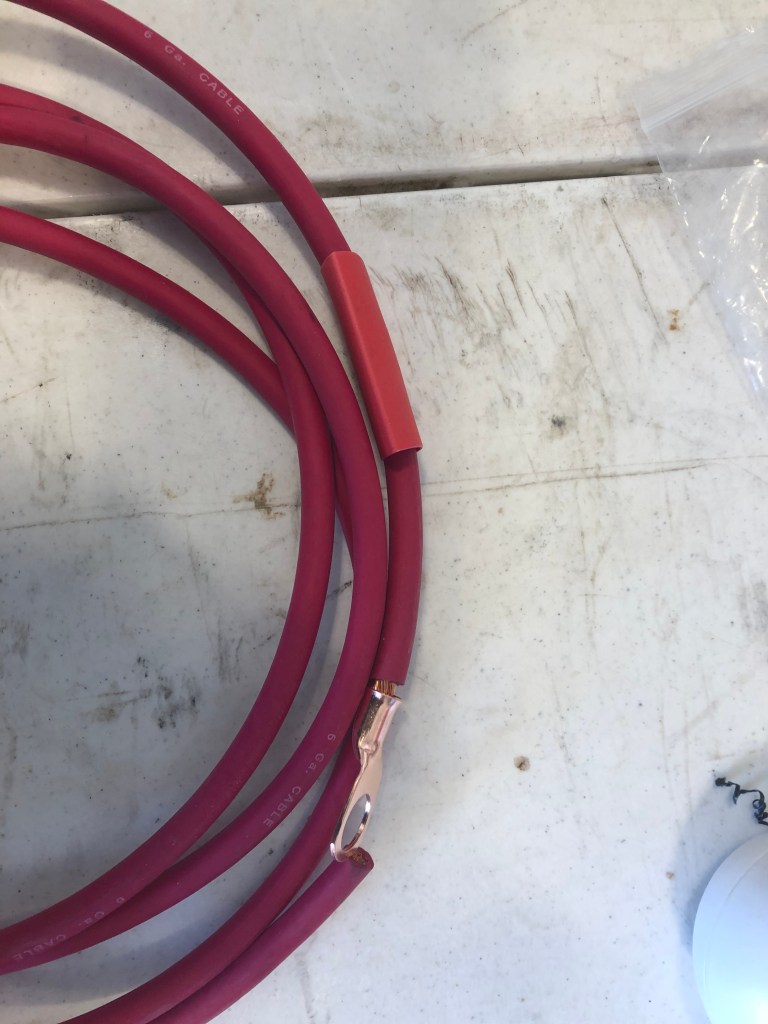
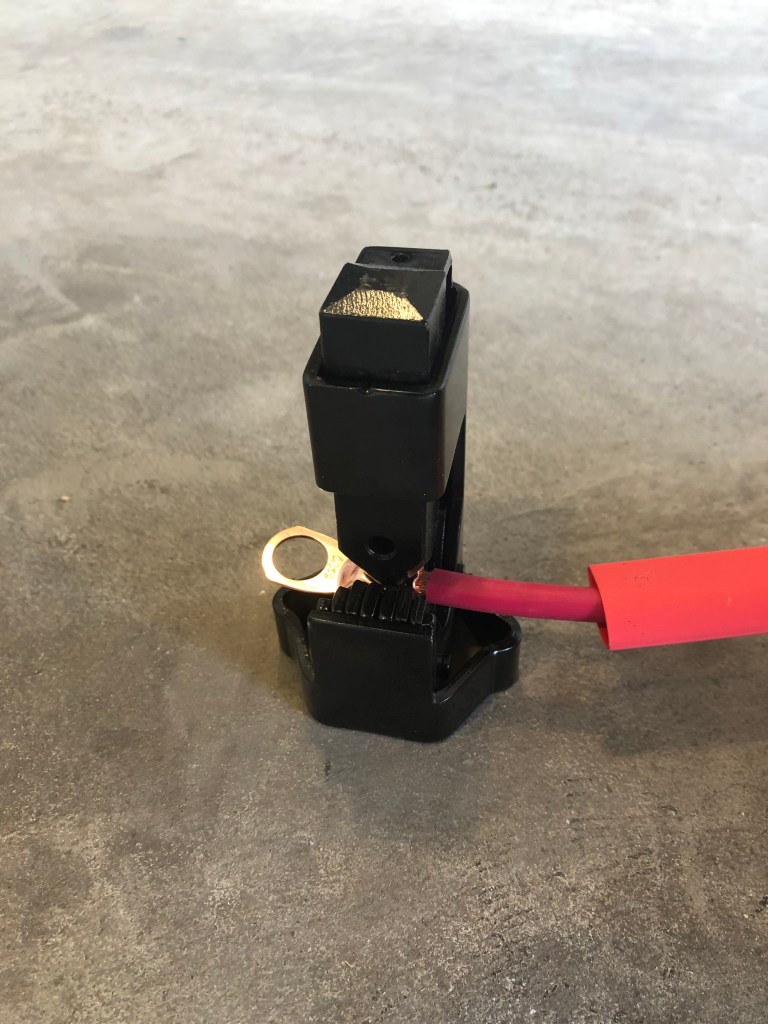
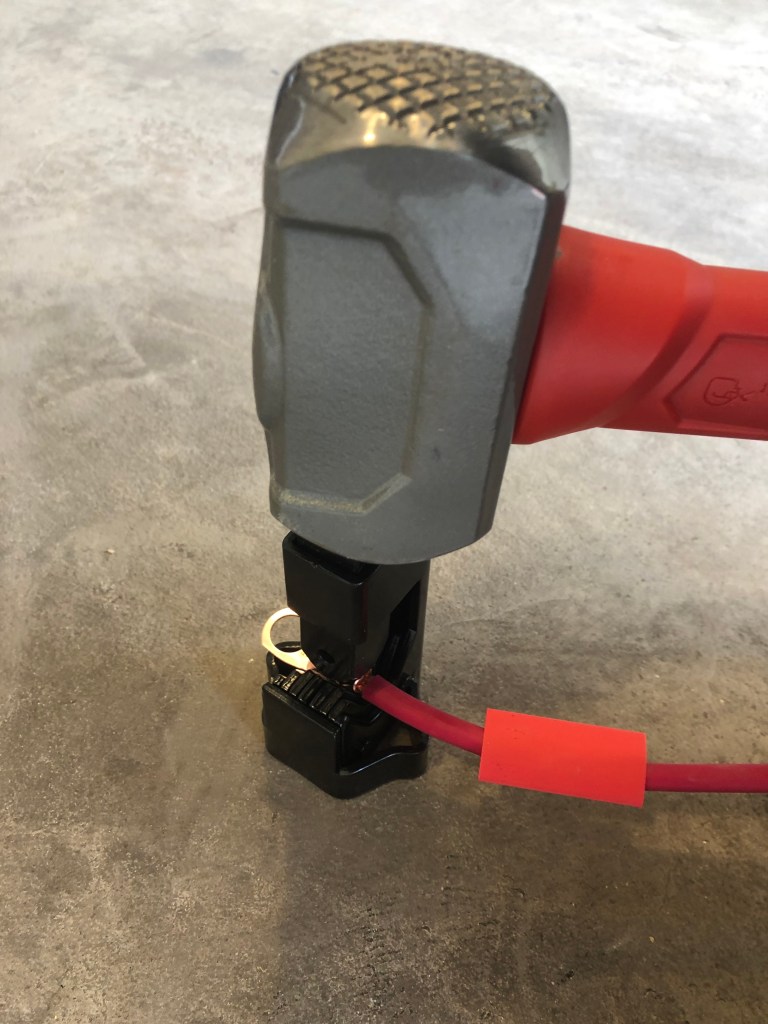
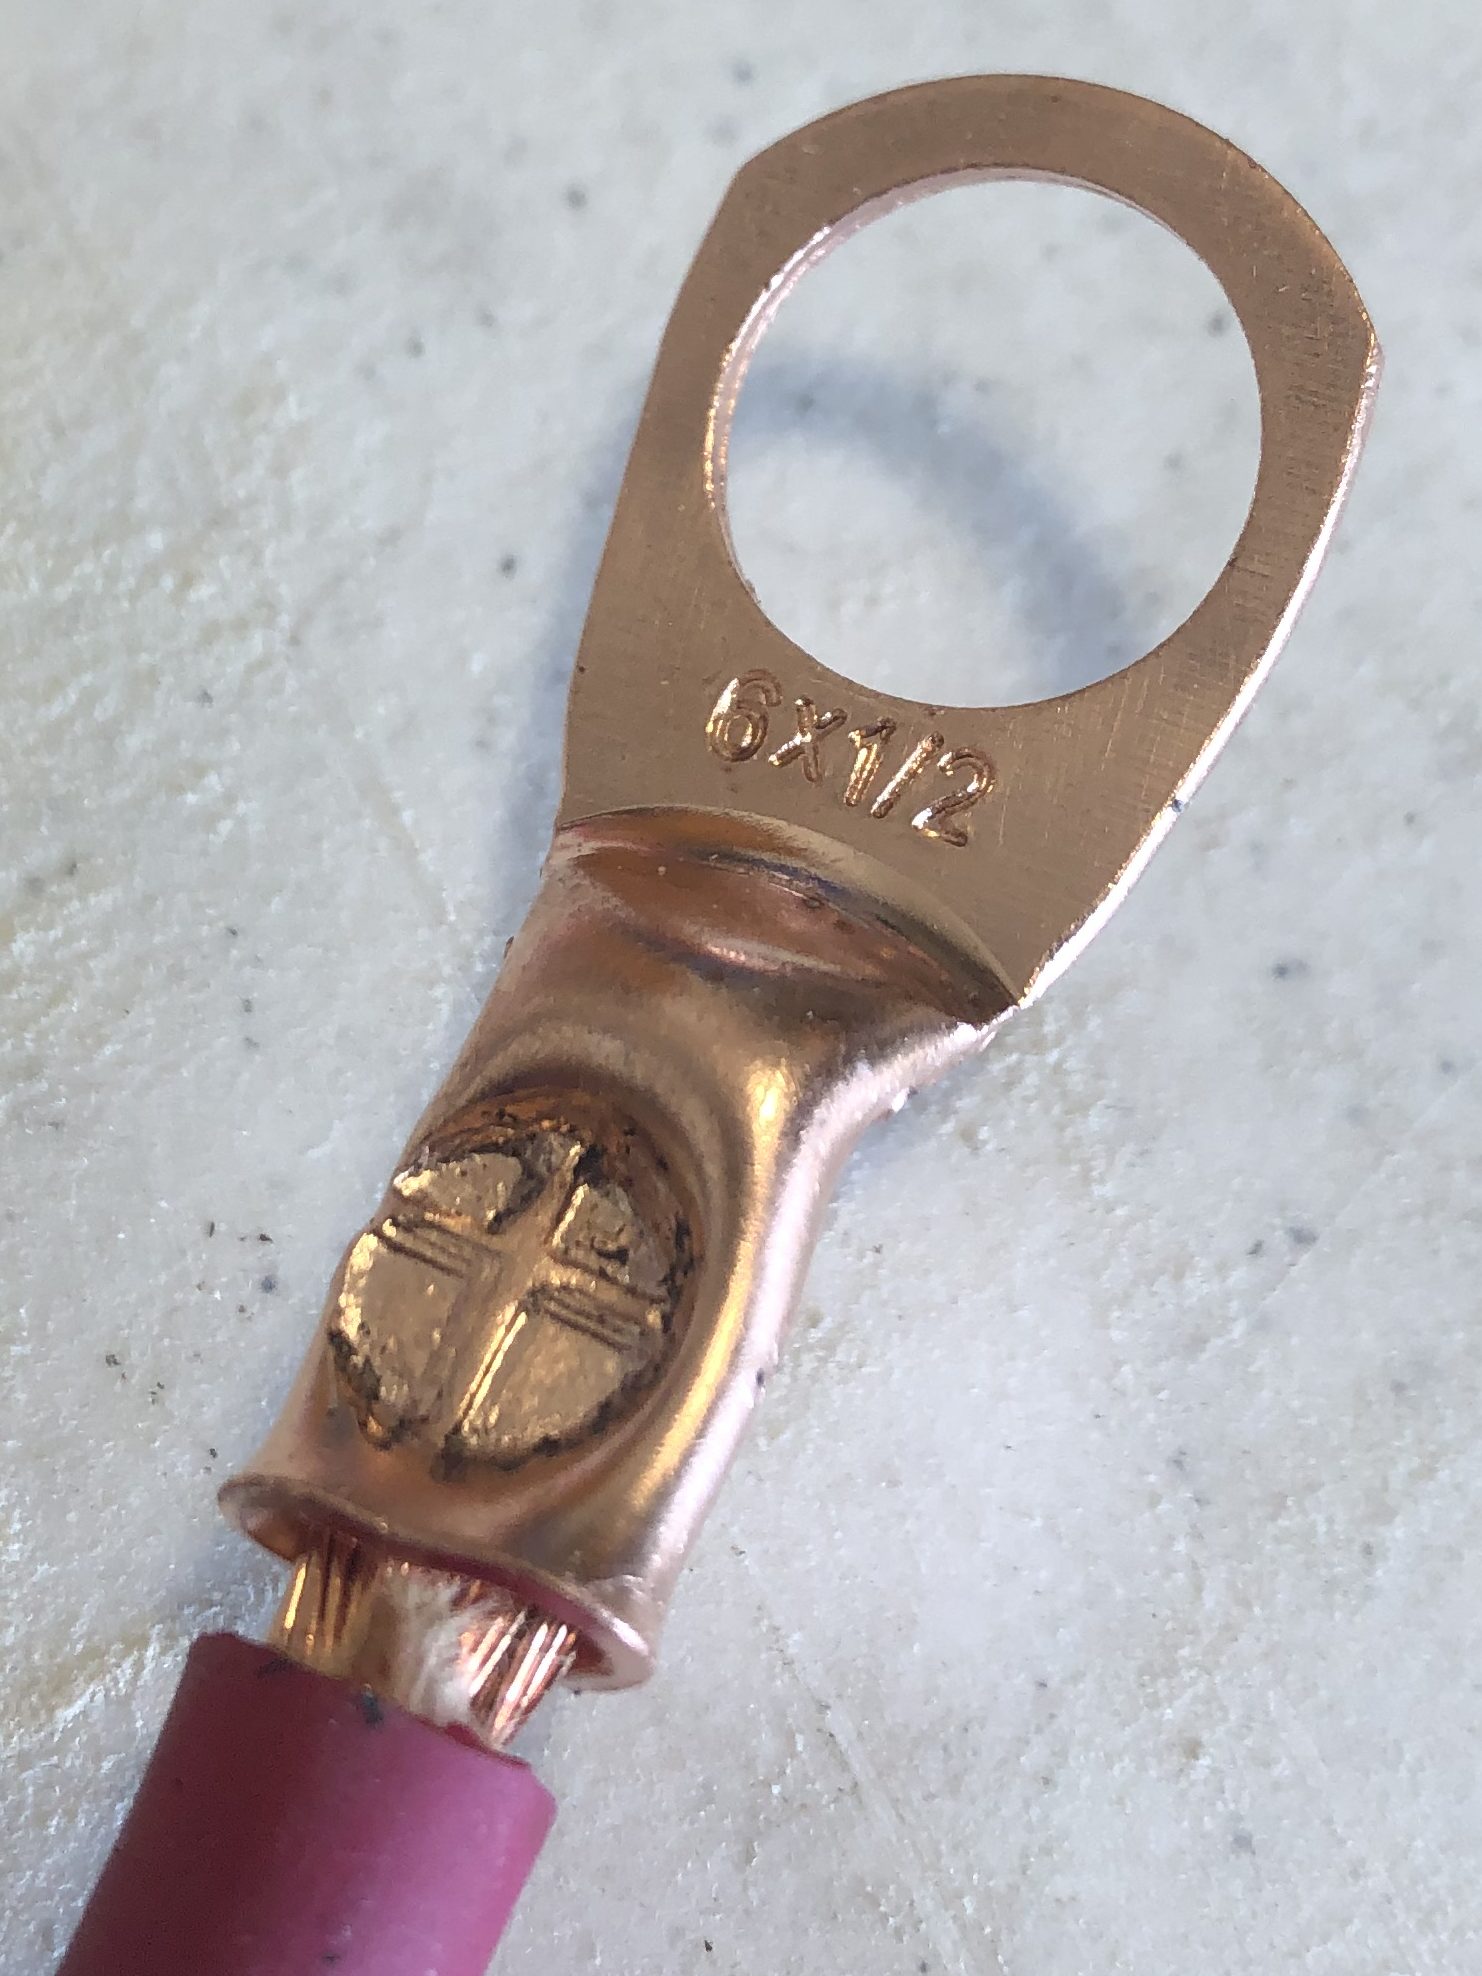
Use a wire or bolt cutter, cut the wires to length. Strip the wire insulation back so the wire can go into the ferrule of the ring battery lug. Slide the heat shrink tubing over the wire, then crimp the ring battery lug onto the wire using a crimping tool.
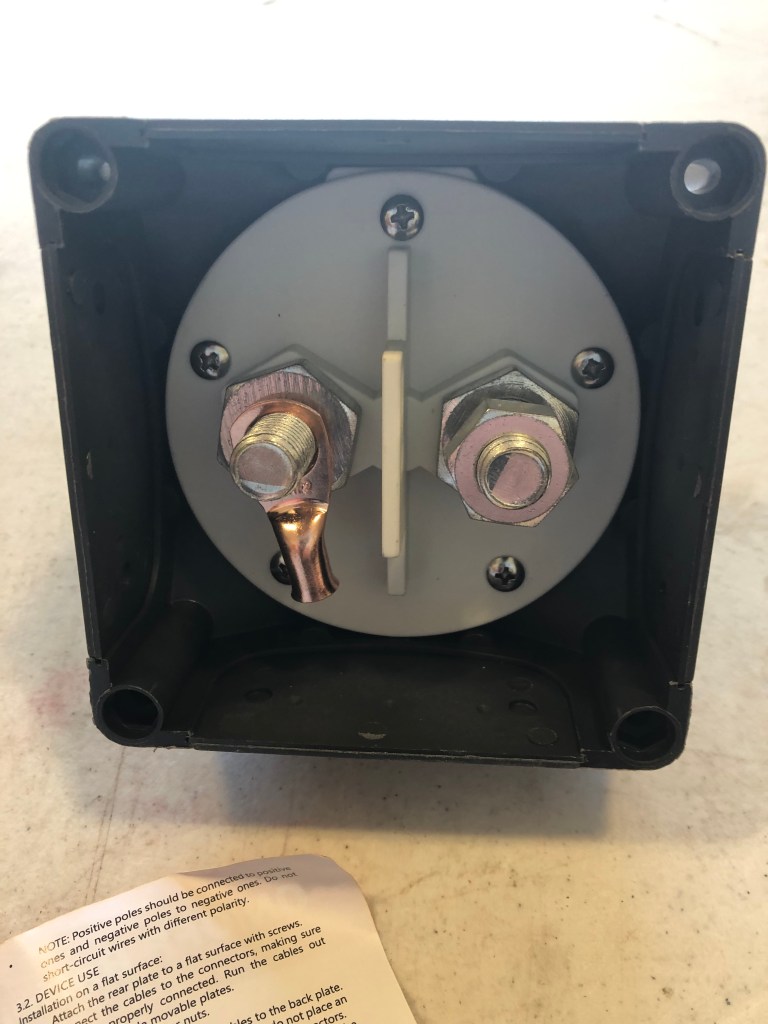
Note: I used 1/2 inch ring battery lugs on both sides of the new cables because that is the size of the terminals on the high current battery disconnect switch. I wanted to put smaller ring battery lugs on the battery side because the bolt is smaller, but I didn’t have them on hand to complete the project during the day. Also, if you use the regular battery disconnect switch, which I recommend, the terminal diameters will be smaller on that switch and the ring battery lugs should be sized appropriately.
With the ring battery lug secured to the wire, slide the heat shrink tubing over the ring battery lug ferrule and exposed copper wiring. Use a heat gun to shrink the tubing into place. This will help keep moisture out of the wire to reduce corrosion over time.
Step 4: Connect Cables to Battery Disconnect Switch & Install Sides
With the wires made and the switch location defined, the wires can be mounted to the battery disconnect switch. The length of the integrated trailer wires and the takeoff angles dictated which way to route the wires. To my disappointment the battery terminal lugs extended beyond the edges of the battery disconnect switch the choice to have two wires running to each terminal made the wire exit larger and more difficult to handle. I had visions of a nice small hole with the wire coming out of it.
I thought about leaving the sides off completely but decided it would get too much water and road grime on the terminals. Not to mention this is the positive side of the battery so it would be an electrical shock hazard. I decided to cut larger holes in the inserts for the wires and then close them with materials that I had on hand.
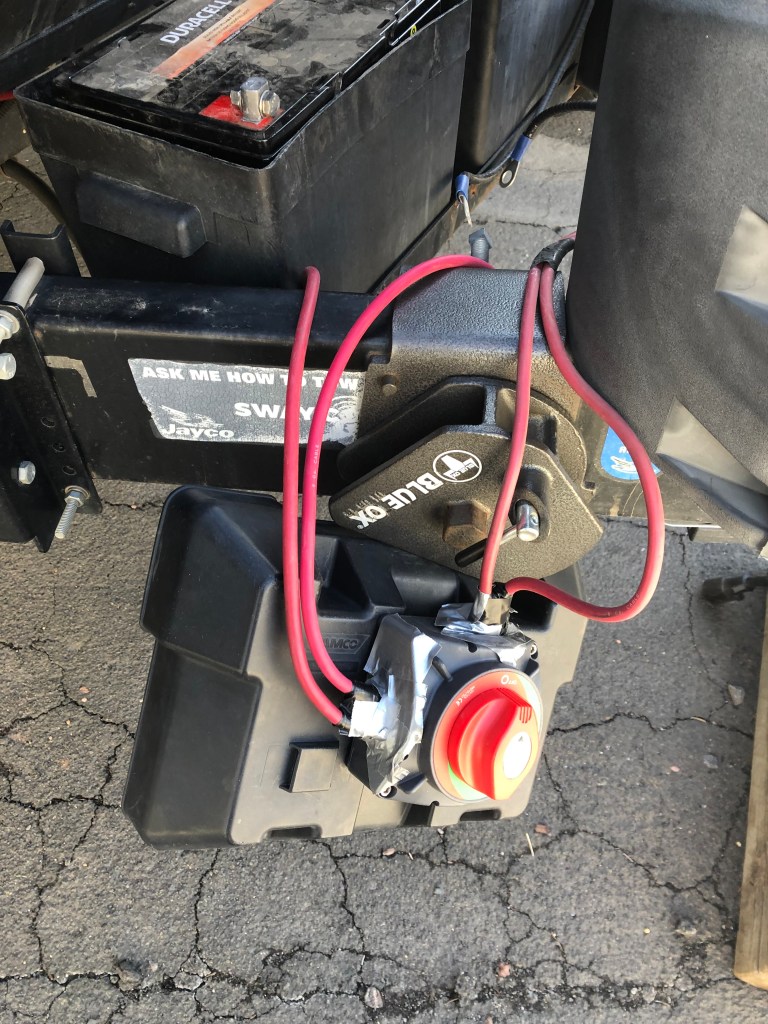
On the trailer side, I cut the window a little tight. This is good for sealing the battery disconnect switch, but it did put the insulation in contact with the plastic body. I decided to put a small piece of model airplane foam around the wires to help protect them. Then I sealed both openings with electrical tape.
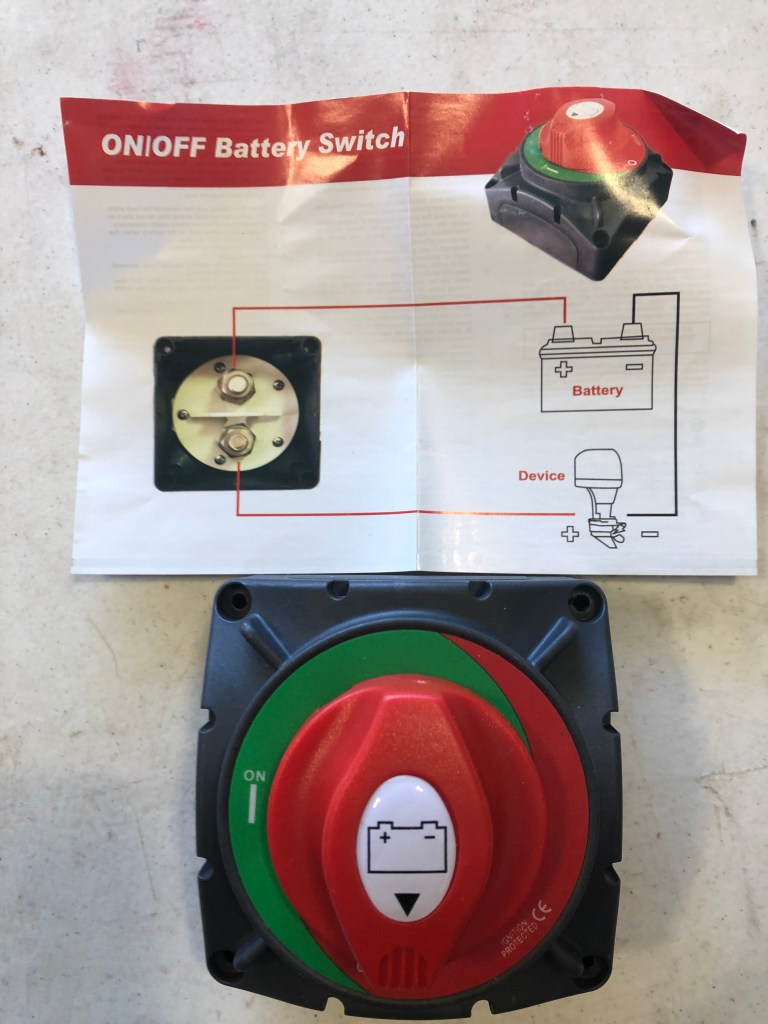
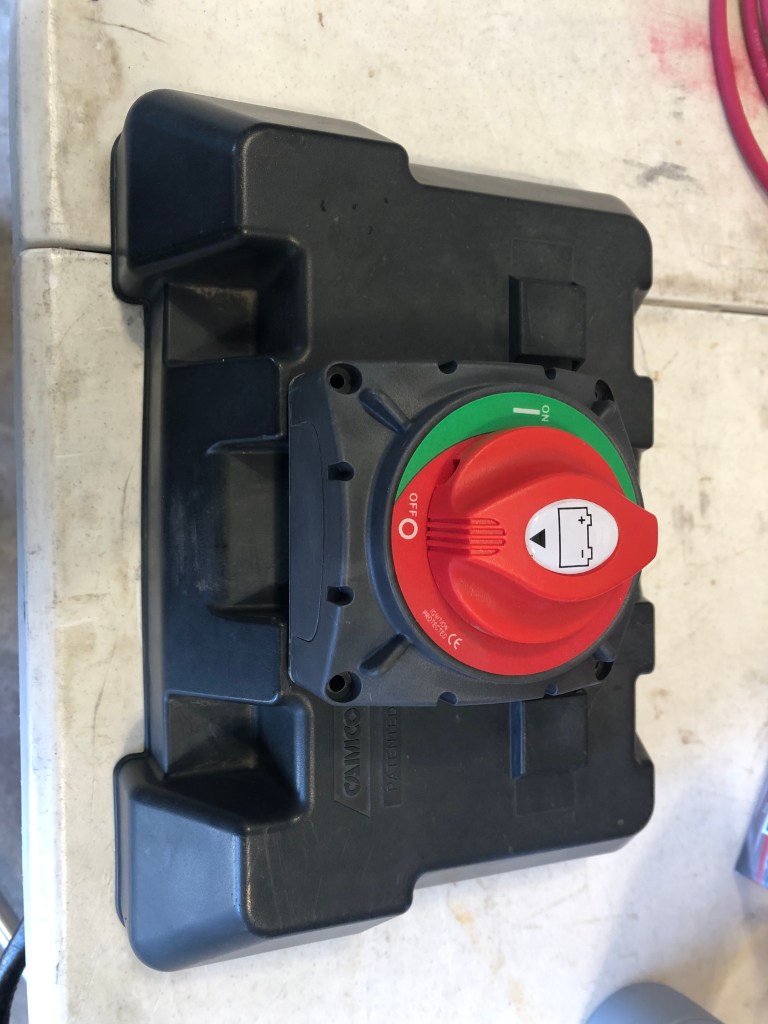
CAUTION: When reading reviews of several battery disconnect switches, there was a recurring 1-star comment theme. Many users connected the positive battery terminal on one side and the negative battery terminal on the other side. When they changed the battery disconnect switch to on, this shorted the battery to itself making for a very dangerous situation. If your battery disconnect switch shows a (+) and (-) on it; it means connect the (+) to the wires that will connect to the positive terminal of your battery(ies) and the (-) to the positive wires that go to your trailer. This will interrupt the positive side of the batter(ies) when the battery disconnect switch is set to the off position.
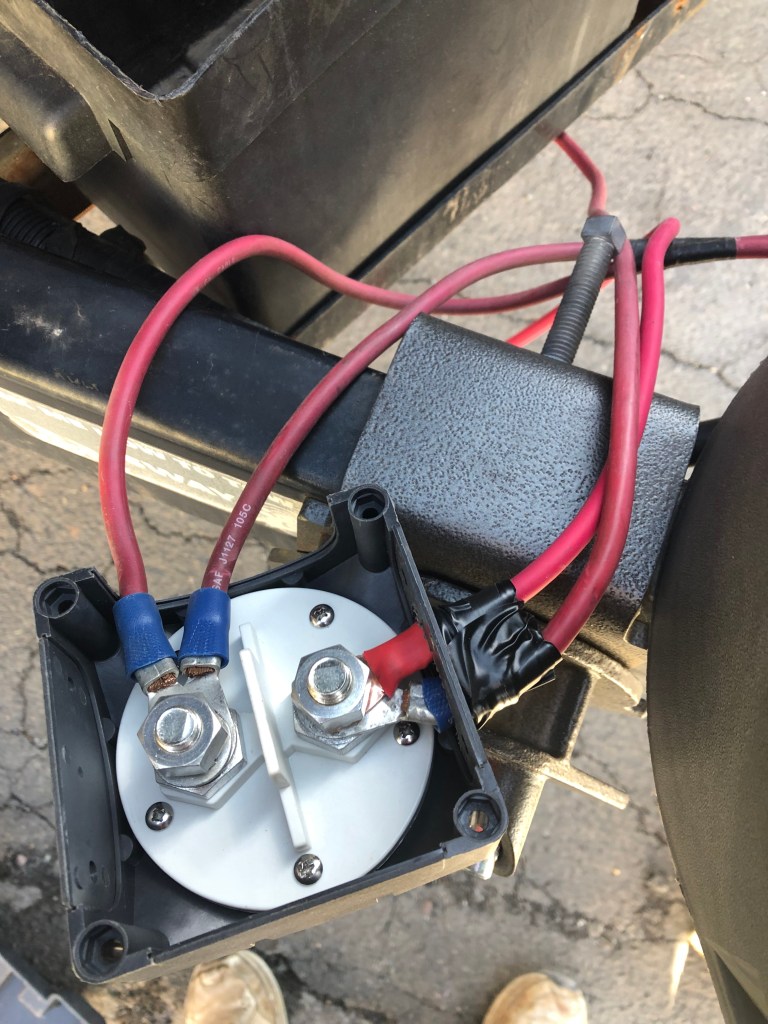

With the battery disconnect switch set in the final location. Determine the routing of the wire. Make sure the wires are long enough to attach to the battery, but not routed in a way that the wire is contacting the metal chassis of the trailer.
Remove the windows from the side of the battery disconnect switch the wires will be exiting from. Put the battery disconnect switch in the off position. Attach the wires to the battery disconnect switch and tighten the nut to secure the wires. Using a silver Sharpe or similar, mark where the windows need to be cut for the wires.
Using a coping saw or other cutting device, cut the area out of the windows for the wires to pass through.
Reinstall the windows. If the windows are contacting the wires, trim the windows again. If the windows are tight, add a piece of foam or other material to reduce chafing the wire insulation against the plastic housing.
Since the window is not closed to the elements, use electrical tape to create an insulative enclosure around the wires.
Step 5: Mount Battery Disconnect Switch
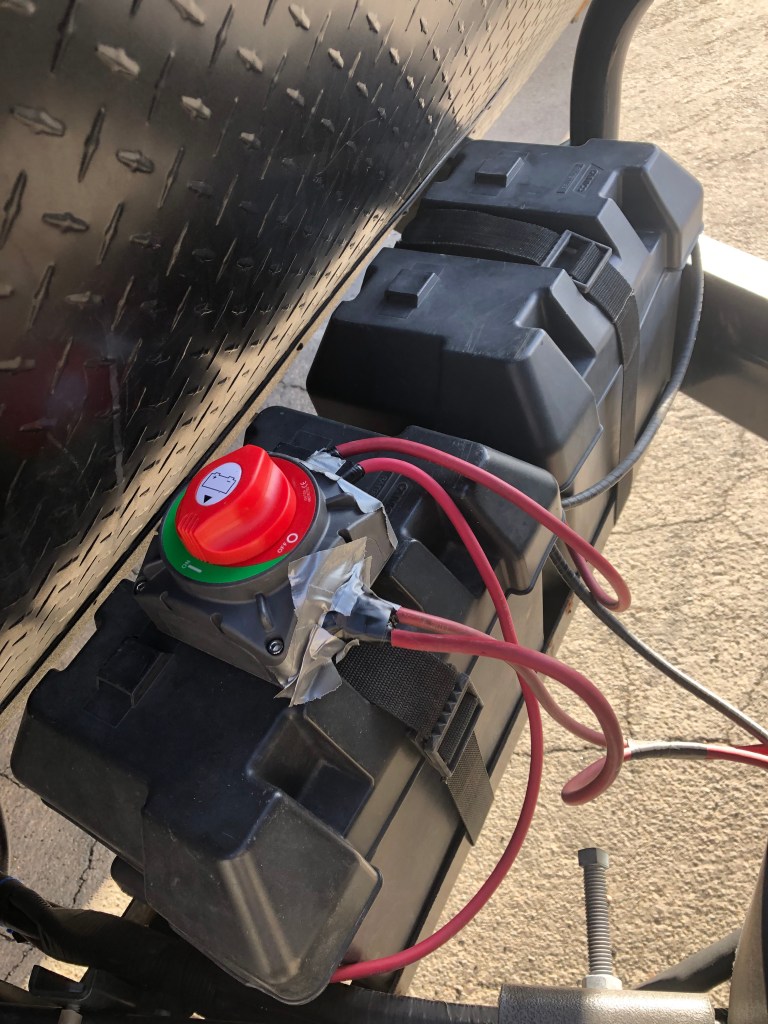
With the wires attached and the windows installed, the battery disconnect switch can be installed onto the Camco Battery Box cover. After installing the battery disconnect switch on the cover, I decided the electrical tape was not going to stay on by itself. As a temporary solution I added duct tape to secure the electrical tape to the battery disconnect switch.
“The handyman’s secret weapon, duct tape.”
Red Green
The duct tape looks pretty bad, but it is only a temporary solution. I plan on replacing the duct tape with Coax-Seal or Silicon Tape to better waterproof the wire exit and entry windows. This tape will protect the battery disconnect switch from the elements better.
Using the four fasteners and nuts that came with the battery disconnect switch to the Camco Battery Box cover. For this battery disconnect switch, the nuts sat in a recessed hole that kept them from rotating and I used an allen wrench to tighten the fasteners.
With the battery disconnect switch attached, use Coax-Seal or Silicone Tape to seal the wire entry and exit points. (The picture shows the temporary duct tape solution).
Step 6: Reconnect Batteries and Test
Before connecting to the batteries, re-verify the battery disconnect switch is in the off position. This will reduce sparking when the battery terminal lugs are attached to the battery posts.
I like to connect the positive terminals first. Without the negative terminals attached, current cannot flow if you accidently hit the positive terminal lug on the chassis. For dual batteries, pay attention to the end of the wire that will mate to the second battery to make sure it doesn’t contact the chassis.
With the battery disconnect switch on the top of one battery cover, I now need to connect the first battery completely (positive and negative terminals/posts) then connect the second battery.
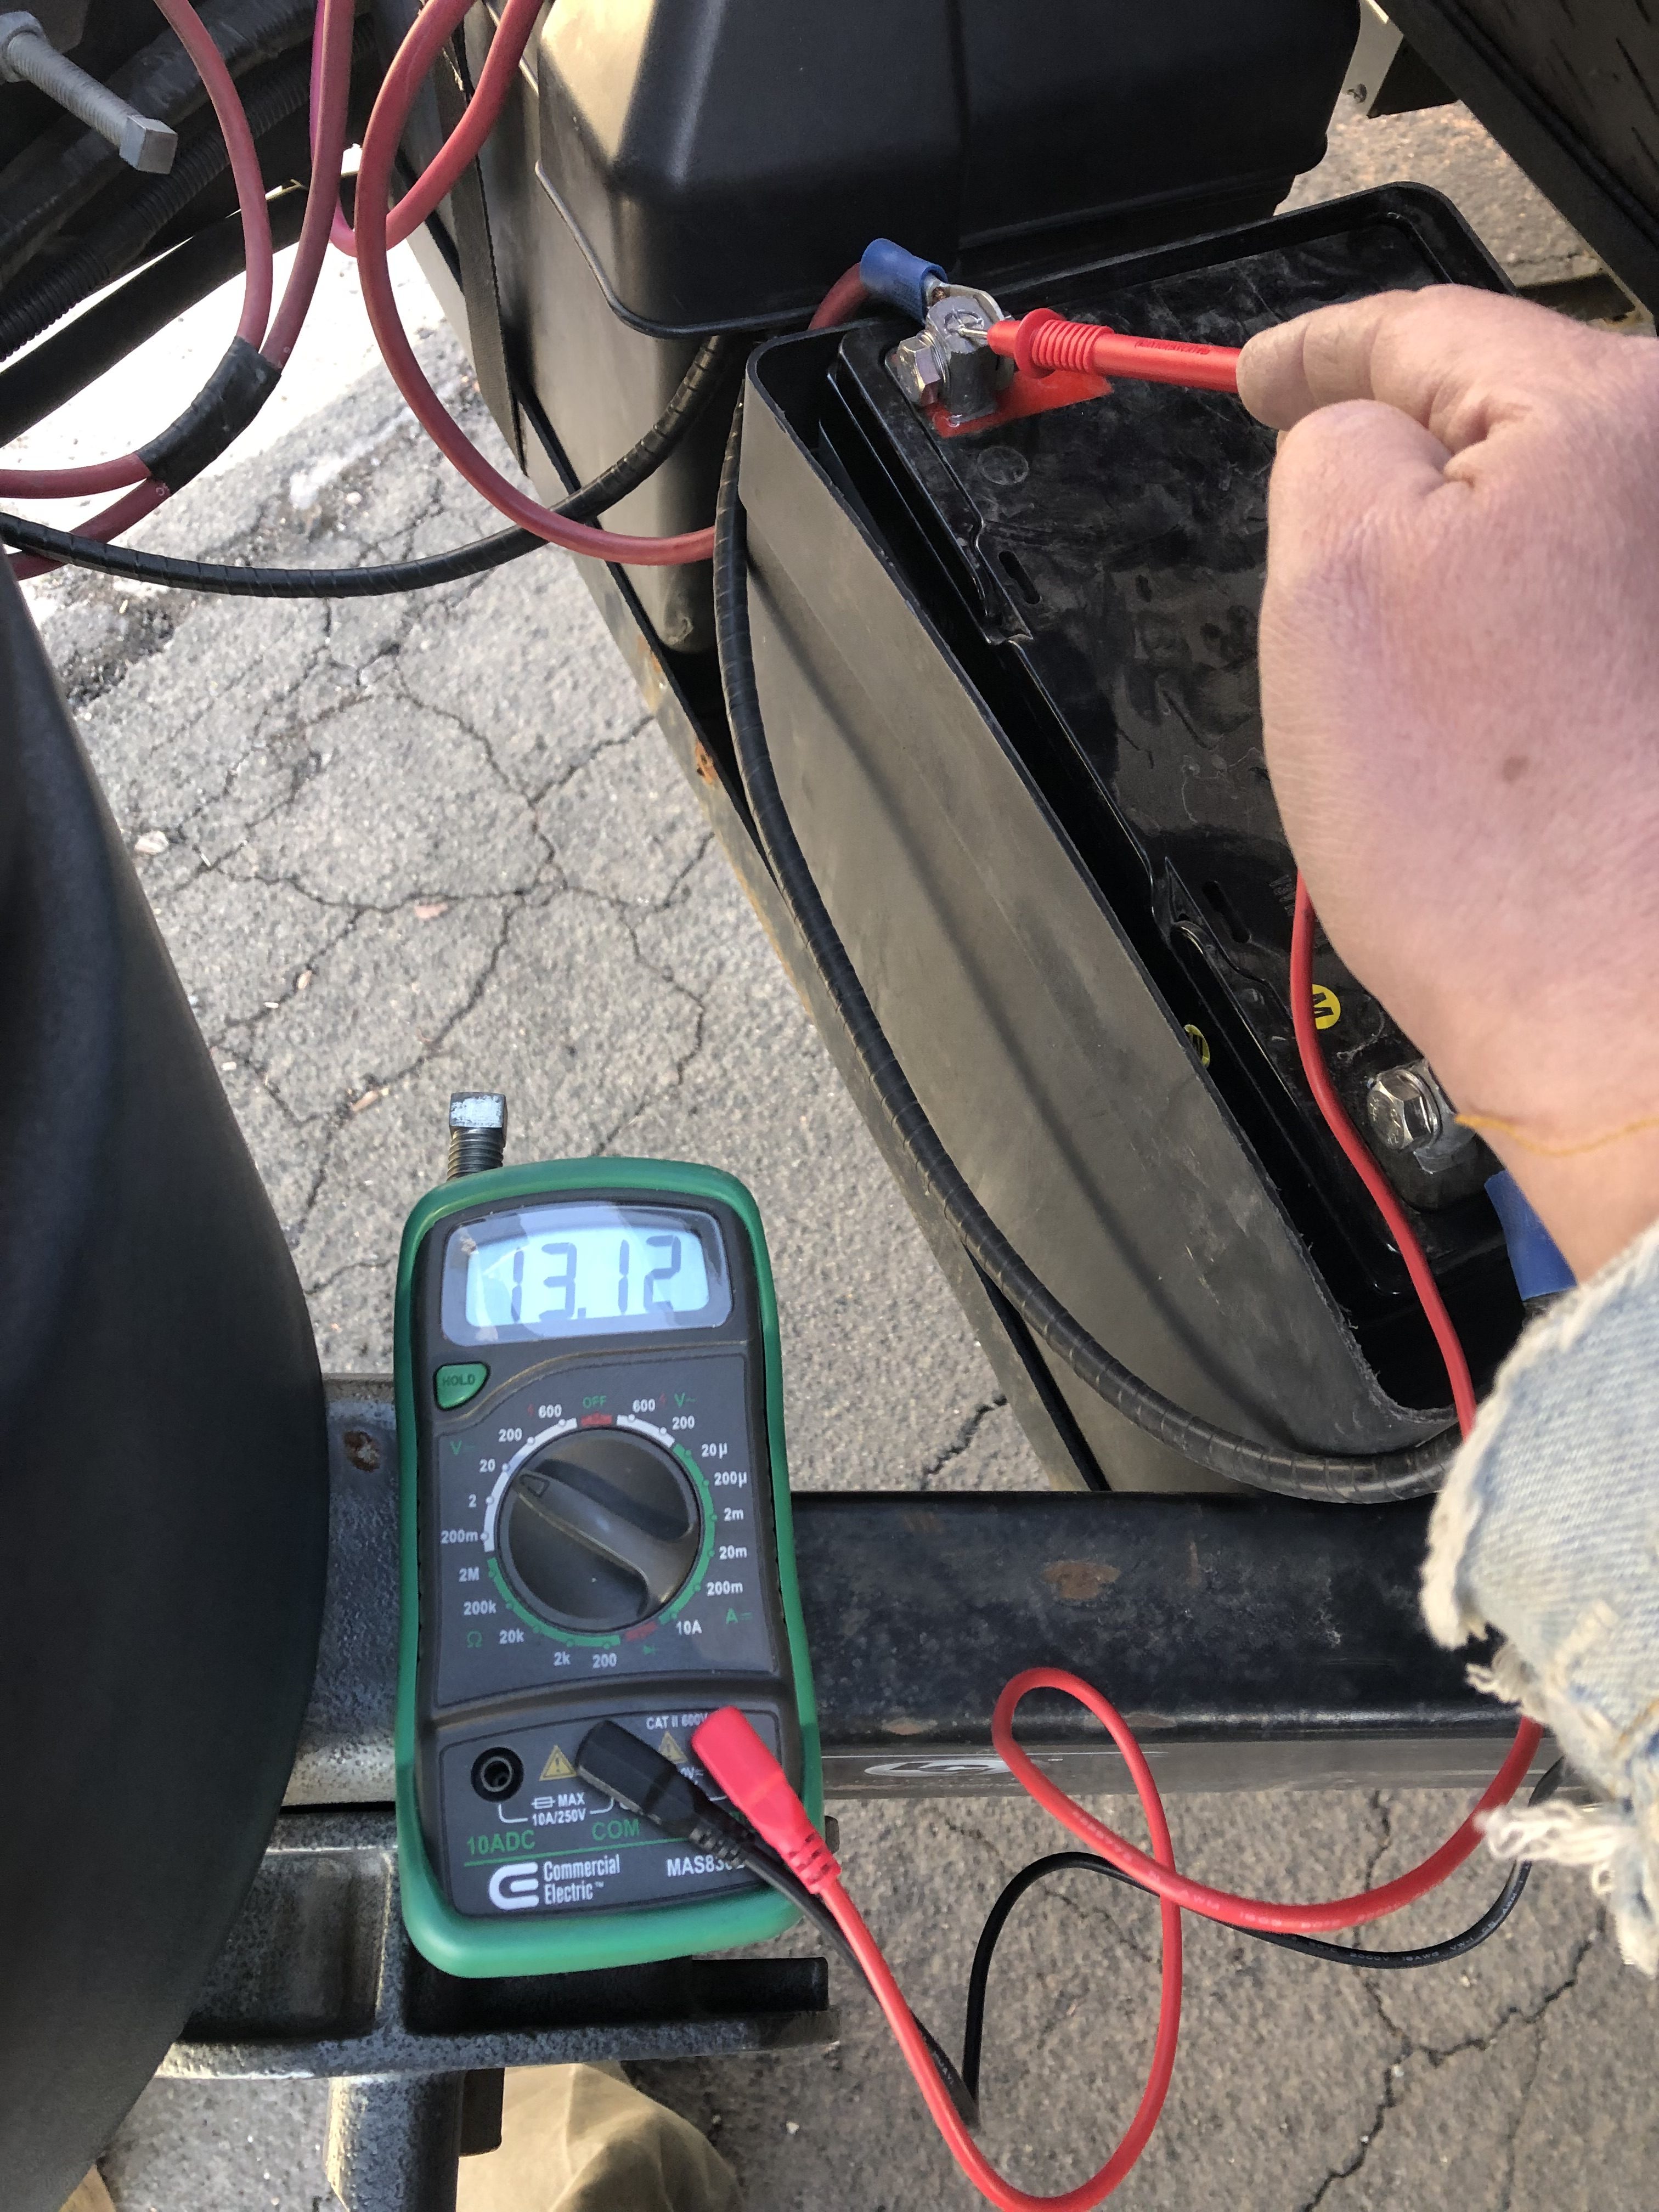
With the batteries connected and the cover still removed from the second battery check that the battery disconnect switch works. Turn the battery disconnect switch to the on position and make sure the lights or other devices on the trailer turn on.
In this case, I also connected to shore power and verified the charging voltage going into the batteries using a digital multimeter. If your lights turn on and off, you don’t need to do this step. In this case, I was verifying the resettable circuit breaker was not tripping snice I rewired to a different resettable circuit breaker.
Step 7: Put Battery Covers Back On

Finish up by putting the second battery cover back on and securing both covers with their straps.
@sowewentdad is excited to have a battery disconnect switch installed on our trailer. Now I won’t have to go out to the storage lot and charge the batteries up every time we have a gap in our trips of more than two weeks. It should also help with the longevity of the batteries because they won’t get drained below 50% capacity if I forget or can’t make it out to charge the batteries over longer gaps in our travels.
“If the women don’t find you handsome,
Red Green
they should at least find you handy.”
@sowewentdad
Please take a moment to follow us on Twitter, Facebook, WordPress, or Instagram to hear more from So We Went to The RV Show:
Or subscribe to receive email updates:
So We Went to the RV Show Blog contains affiliate links. By purchasing through these links, we get a small commission at no additional cost to you. As an Amazon Associate So We Went to The RV Show earns money from qualifying purchases.
So We Went to the RV Show Blog is not affiliated with Ampper, Duracell, Camco, Fiskars, or Jayco.
